Recently, I was reminded why making things with love matters.♥
Vaccination *See cold compress
During the 24-48 hours after the shot, elevate and apply a warm compress to the vaccination site to help relieve the muscle pain. *See cold for first 12-24 hours.
Sinuses, Allergies *listed in cold compress
Alternate between hot and cold compresses to relieve a stuffy nose. Hot loosens the mucus, cold reduces nasal swelling and pressure. Use two separate washcloths. Soak one washcloth compress in hot water and lay over sinuses, below eyes, over nose. After 1 minute, rotate out with new cold compress at same location. Continue rotation about 10 minutes until you find relief.
Acne *also see cold compress
Moist heat helps bring white blood cells to the affected area, speeding healing, and bring impurities to the surface. To close your pores again, rinse with cold water.
Breast feeding *see also cold compress
Warm washcloth compress before nursing can bring comfort. Heard this from a friend, so do what works best for you.
Who knew there were so many uses for a soft washcloth? Instead of reaching for an ice pack or heating pad, which can sometimes damage skin tissue if used incorrectly, reach for a soft washcloth compress. Hope it helps! xo
Never miss a post! Subscribe to ShannonSews
Like on facebook.com/SSorensenDesigns
Follow @ShannonSews1 on Twitter
Subscribe to youtube.com/ShannonSews
Linked to:
http://sewmanyways.blogspot.com/, http://www.iheartnaptime.net, http://www.flamingotoes.com, http://sewchatty.blogspot.com, http://www.thegirlcreative.blogspot.com http://www.ishouldbemoppingthefloor.co
m, http://sewcando.blogspot.com, http://creatingreallyawesomefreethi
ngs.com, http://makingtheworldcuter.blogspot.co
m, http://craftomaniac.blogspot.com, http://www.betweennapsontheporch
.blogspot.com, http://www.skiptomylou.org,
http://diyshowoff.com http://www.linesacross.com http://www.keepingitsimplecrafts.com/ http://sarahdawndesigns.blogspot.com
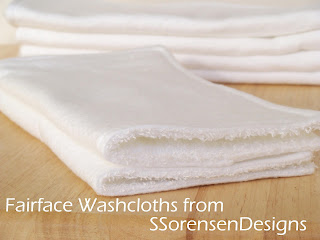
It was like any other sale. At first. A few sets of my soft Fairface Washcloths for sensitive skin. Since they are all I can use for my super sensitive skin, I make them with lots of love in hopes they can help someone else like they've helped me.
It turns out, my sweet customer needed these soft washcloths made with an extra dose of love. These soft washcloths will be used as a cold compress to soothe her face, as she goes through a chemotherapy treatment.
It's moments like this that make it all worth it. Knowing that I am helping someone else with what I make, is as good as it gets.
As it turns out, there are a lot of conditions where a soft washcloth cold compress or hot compress can bring relief.
Using a Soft Washcloth
as a Cold or Hot Compress
as a Cold or Hot Compress
Sources: Livestrong.com, Mayoclinic.com, Webmd.com
COLD COMPRESS REMEDIES:
Headache
Place a cold washcloth compress on your forehead allowing blood vessels to constrict and reduce the inflammation that causes the pressure and pain in your head.
Eczema or other Itchy Skin
Apply a cold, soft washcloth compress for 10 minutes to ease itchy skin. Repeat as needed until itch subsides.
Puffy eyes
Put a soft, clean washcloth in cold water, ring it out, and place it on your puffy eyes (best time right after waking). Repeat until the puffiness subsides.
Vaccination sites *See heat also
Place a cold compress on the site to reduce swelling, redness and tenderness within the first 12 to 24 hours. *See heat for next step
Wisdom tooth or other tooth pain
Hold a cold compress against your jaw to relieve pain for about 10 minutes, keeping cloth cool.
Fever
Cool your body down by placing a cold, soft washcloth compress on the forehead or nape of the neck where the hypothalamus is located for optimal cooling effect.
Sunburn Relief
Cold washcloth compresses can help relieve the heat of your sunburn, even if it's only temporary. Also try putting your clothes in the freezer before wearing to keep sunburned body cool (never thought of that before!).
Sinuses, Allergies *see also hot compress
Alternate between hot and cold compresses to relieve a stuffy nose. Hot loosens the mucus, cold reduces nasal swelling and pressure. Use two separate washcloths. Soak one washcloth compress in hot water and lay over sinuses, below eyes, over nose. After 1 minute, rotate out with new cold compress at same location. Continue rotation about 10 minutes until you find relief.
HOT COMPRESS REMEDIES:
Eyes
Ease tired dry eyes, reduce muscle pain, relieve a stye, and increase circulation around your eyes.
Cold compress: Reduces inflammation (swelling), itching, irritation, bruising, and constricts blood vessels. A cold compress can be made by soaking a soft washcloth in cold (ice) water or placing a cold, damp washcloth in the freezer for 10 minutes and then applying. When the washcloth warms up, cool off again, ring out and reapply.
Headache
Place a cold washcloth compress on your forehead allowing blood vessels to constrict and reduce the inflammation that causes the pressure and pain in your head.
Eczema or other Itchy Skin
Apply a cold, soft washcloth compress for 10 minutes to ease itchy skin. Repeat as needed until itch subsides.
Puffy eyes
Put a soft, clean washcloth in cold water, ring it out, and place it on your puffy eyes (best time right after waking). Repeat until the puffiness subsides.
Vaccination sites *See heat also
Place a cold compress on the site to reduce swelling, redness and tenderness within the first 12 to 24 hours. *See heat for next step
Wisdom tooth or other tooth pain
Hold a cold compress against your jaw to relieve pain for about 10 minutes, keeping cloth cool.
Fever
Cool your body down by placing a cold, soft washcloth compress on the forehead or nape of the neck where the hypothalamus is located for optimal cooling effect.
Sunburn Relief
Cold washcloth compresses can help relieve the heat of your sunburn, even if it's only temporary. Also try putting your clothes in the freezer before wearing to keep sunburned body cool (never thought of that before!).
Acne *also see hot compress
Temporarily relieve cysts, or other painful acne that haven't come to the surface. A cold compress (dampened, then frozen for 10 minutes) can reduce inflammation and pressure (gives you a numbing affect).
Breast feeding *see also hot compress
Cold compress after nursing can bring comfort. Heard this from a friend, so do what works best for you.
Cold compress after nursing can bring comfort. Heard this from a friend, so do what works best for you.
Sinuses, Allergies *see also hot compress
Alternate between hot and cold compresses to relieve a stuffy nose. Hot loosens the mucus, cold reduces nasal swelling and pressure. Use two separate washcloths. Soak one washcloth compress in hot water and lay over sinuses, below eyes, over nose. After 1 minute, rotate out with new cold compress at same location. Continue rotation about 10 minutes until you find relief.
HOT COMPRESS REMEDIES:
Hot compress: Increases blood flow, loosens and relaxes sore, stiff, achy muscles, tired dry eyes and relieves arthritis. Heat can also promote healing acne. Hot compresses are made by soaking a soft washcloth in hot or warm water (not too hot to burn yourself), ringing it out and using it on the affected area. When the washcloth cools, re-submerge in hot water, ring out and repeat.
Eyes
Ease tired dry eyes, reduce muscle pain, relieve a stye, and increase circulation around your eyes.
Vaccination *See cold compress
During the 24-48 hours after the shot, elevate and apply a warm compress to the vaccination site to help relieve the muscle pain. *See cold for first 12-24 hours.
Sinuses, Allergies *listed in cold compress
Alternate between hot and cold compresses to relieve a stuffy nose. Hot loosens the mucus, cold reduces nasal swelling and pressure. Use two separate washcloths. Soak one washcloth compress in hot water and lay over sinuses, below eyes, over nose. After 1 minute, rotate out with new cold compress at same location. Continue rotation about 10 minutes until you find relief.
Acne *also see cold compress
Moist heat helps bring white blood cells to the affected area, speeding healing, and bring impurities to the surface. To close your pores again, rinse with cold water.
Breast feeding *see also cold compress
Warm washcloth compress before nursing can bring comfort. Heard this from a friend, so do what works best for you.
Who knew there were so many uses for a soft washcloth? Instead of reaching for an ice pack or heating pad, which can sometimes damage skin tissue if used incorrectly, reach for a soft washcloth compress. Hope it helps! xo
Never miss a post! Subscribe to ShannonSews
Like on facebook.com/SSorensenDesigns
Follow @ShannonSews1 on Twitter
Subscribe to youtube.com/ShannonSews
Linked to:


