Thursday, December 30, 2010

Anthropologie apron refashion: from waist to full apron

I hope you are all enjoying this holiday season.
I can't believe the new year is just around the corner!

Yesterday my mom, sister and I went to the downtown Seattle Anthropologie. Their sale items are placed right as you walk in the door...how did they know it wouldn't take long for me to find something I couldn't live without??

I've been eying Anthropologie's ruffled aprons for-ever.

So lovely and feminine.

However, I'm am a grease magnet when I cook. I can't tell you how many times I've gotten a greasy spot or two on the front of my shirt that seems to have flown out of nowhere. And yes, it's because I was too lazy to open a drawer and put on an apron. Pathetic.

I decided that although this apron is absolutely beautiful just the way it is, it wouldn't be able to protect the few grease-less shirts I still have left.

So I decided to turn this waist apron to a full apron, by adding a top, and hoping at the same time to maintain it's delicate style.

Again, here is the before:


And here it is after my apron refashion:


I really like how it turned out. It kind of feels like it was always meant to be this way.

I found some flowered cotton material in my stash that worked for the top, and used natural muslin for the neck strap.

Here are a few tips on how I refashioned a waist apron to a full apron:

The piece of flowered fabric I had was only about 7" wide and about 23" long


In order to have enough material to extend the top width, I had to cut the 23" long piece in half long-ways and then in half vertically to add two panels to the front.

Here I have each piece pinned right sides together to the main front piece. Most people would already have it wide enough to start with. Measure across your chest to see how wide you want the front piece.

After sewing the side panels to the main front panel:
I hemmed all sides and top, then ironed down seams to lay flat.
I attached the top to the waist of the apron by sewing it wrong sides together and stitching along the bottom hem line of the waist (with cream colored thread to match the apron waist).


When finished, I flipped up the front and top stitched across the front of the waist to secure it. (sorry no photo)

For the neck piece, I cut about a 4" wide x 22" long piece of natural muslin, folded it in half and straight stitched.


Ironed the seams down
Turned it right side out and top stitched about 1/4" in to secure.
I should have left about 1/2" on each edge to turn under, but I forgot and didn't want to take the top stitching and original stitching out, so I opted for a zig zag stitch on the ends (since they wouldn't be showing anyway).
I stitched the neck strap ends to the back side of the top by top stitching on the front of the apron, in a rectangle shape to secure all four sides (switching back to light blue thread)

I'm so excited to wear it! But I guess that means I have to cook... :)


Linking to:

TrulyLovely
SomewhatSimple
TeaRoseHome
TheShabbyChicCottage
BlueCricketDesign
SewMuchAdo
HopeStudios
PaisleyPassions
AGirlInParadise

Thursday, December 23, 2010

Happy Holidays!

I'm stepping away for a little while to celebrate the holidays. And although I would be content sewing every single day of the week, spending time with family and friends at this time of year is at the top of my list.

At the coming of the new year, I have a few projects already lined up:

Make more of these delicately soft washcloths


A ruffly apron out of this colorful Anthropologie tablecloth

A set of pillows made from these lovely Anthropologie towels

A set of baby soft bibs and burp cloths for a friend welcoming a little pink bundle into the world


And creating another how to make a small shirt bigger tutorial (in much better detail)

So long for now.

Wishing you and your family a wonderful holiday season
and prosperous New Year!


Tuesday, December 21, 2010

Anthropologie copy-cat shirt so far

Hmmm...this was harder than it looked. I'm still not sure what to think of it.

I'm not finished - it's just pinned on, and I have a lot of reworking to do (still looks a little drapey)

but this is it, mid-fashion...


The first problem is the weight of the fabric. Theirs is very lightweight and very stretchy jersey. Mine is a much thicker, minimal-stretch jersey. It added a lot of bulk, which made it difficult to duplicate this delicate design.

And the swig-swag at the bottom (I think I just made up my own word) was difficult to duplicate, once again, due to the heavy fabric.

Sigh...
At this point I'm not sure whether to scrap it and try again on a different very lightweight shirt, or try to work this one out.

But alas, Christmas is four days away, and I have presents to wrap and errands to run, so this refashion will most likely be put on hold until January comes around.

...but maybe I'll have time to pull out my Anthropologie tablecloth and cut it up to make a ruffly apron and make myself feel better... :)

Before I sign off, I have one more Anthropologie plug (you'd think I worked for their advertising dept or something)

Look what I found this morning at their holiday sale:
[*I went to return the gray shirt and heaven forbid I leave empty handed]

A new pretty knob for my sewing desk top drawer ($2.95)
(forgive the paint job -that's a project for summer 2011)


And a pair of pretty knobs for my top dresser drawer ($2.95 ea.)
(my dresser needs a bunch of new knobs and a fresh coat of paint)
And last but not least, and just in time for Christmas, a new star for the top of the tree


Monday, December 20, 2010

Ruffled pillow featured on Truly Lovely

Truly Lovely just made my day! My shabby ruffled muslin pillow was featured as one of their favorite picks of the week! How lovely is that?! Thanks Truly Lovely!


So what's next for me?

I'm going to try and make a look-a-like for this little number, from Anthropologie:
Remember a week or so ago when I confessed my obsession with Anthropologie and was all giddy because I bought my favorite shirt online at the sale price??

Well, if I can just get to the point, I got the shirt in the mail and quickly giddy turned to gaspy when I realized it fit me as tight as a sausage casing. And I don't mean that in a good way, in case you like sausage.

So this beautiful shirt has to be returned, and it looks like I won't ever be buying clothes from Anthro online again. But, what I am going to do before I return it, is study the shirt and try to re-create it. Because although I love sausage with my waffles, I won't be wearing any.

Sunday, December 19, 2010

Make-a-small-shirt-bigger tutorial #2

I have some fun news!

According to Hope Studio's Stuff I learned posting, my 1st make a small shirt bigger submission for Tutorial Tuesday ranked the 2nd most clicked link that week. I'm excited about that! I guess that means there are a lot of small shirts out there crying out to be bigger!

However, before I get too excited, I do wish I had done more with that tutorial. So, in honor of those seeking to breathe life back into their shrunken shirts, here's another fix-your-small-shirt tutorial with better play by play instructions.

...thanks for the clicks!


Saturday, December 18, 2010

Sewing with a dress form

I my dress form.
For about the first 10 months of my sewing career, I spent a lot of time on the floor...hunched over material with scissors and pins...or in front of the mirror...pinning clothes together directly on myself, or at times, into myself (ouch!).

Now with my dress form I'm able to pin fabric designs together, add embellishments to shirts, drape fabric, and see it all in a much more realistic way. It's so much easier to view designs from all angles, instead of trying to make alterations while eyeing myself in the mirror (although I am still known to do that from time to time).

I decided on a set-size dress form, in my size, rather than getting an adjustable dress form (i.e. Dritz and Singer), a plaster mannequin, or making myself one out of duct tape (good tutorial from Prudent Baby).

I based my decision on A) what I wanted it for (my clothes versus clothes for other people), B) reviewer ratings of all forms, and C) my sister's opinion (a soon-to-be graduate from FIDM in L.A.) who said she loved working with a set-size dress form, as it gave her a realistic view of her own size.

I loved that idea. My own body double! No more pinning to myself. No more guessing.

And so for my birthday, my husband bought my dress form here.

And now I have a 3 dimensional friend to try everything on for me, who also happens to look just like me (minus the head anyway).

And sewing life hasn't been the same since.
It's been much, much better.

Wednesday, December 15, 2010

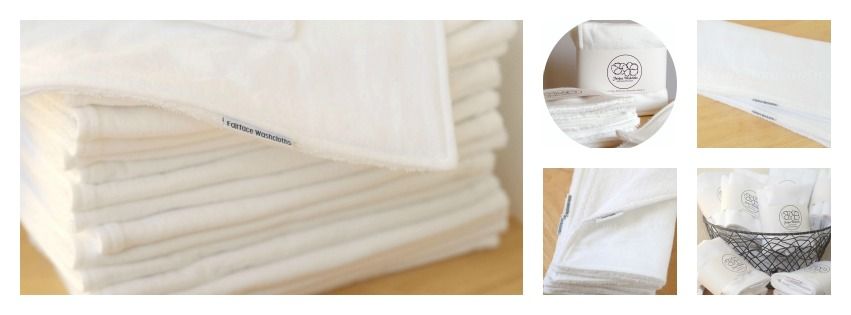
Washcloths for sensitive skin: Fairface Washcloths™: soft & gentle

If you have sensitive skin like I do, regular washcloths can feel too harsh. Even washing with them as gently as I can, my face always ends up more red and irritated than it started. Ugh.

So what's my solution? A few years ago I started making my own soft washcloths out of the softest materials I could find. And you know what? It's made all the difference in the world! My face has never felt or looked better. No more redness and irritation. Move over scratchy old washcloths, now there's something much, much softer!

Fairface Washcloths the softest, most gentle way to wash sensitive skin

 photo Fairface-Washcloths-header-FB_zps3758bc20.jpg

And since they changed my life in such a profound way, I couldn't keep the secret all to myself. I now make them for the world to enjoy! 

Attention all sensitive skin: don't be afraid to wash your face anymore! 

With the softest combination of face-friendly cloths, Fairface Washcloths™ provides you with the softest, most gentle facecloth, for a gentle cleansing, free from additional redness and irritation. Trust me, you'll wish you'd found them years ago! 

The {Original Fairface Washcloths'™} flannel side is amazingly soft and the terry cloth side is gentle, with just enough scrub. There is also a new option {Fairface Washcloths™ ~ Delicate} that is even softer(!), gentle enough for even the most fragile, delicate skin.

...............................................................

Check out our Fairface Washcloths Blog for additional information
Available for purchase through our Fairface Washcloths Shop

rosacea skin care softest cloths for washing face reduce redness
Fairface Washcloths™ | An Exclusive Product of Shannon Sorensen Designs

Monday, December 13, 2010

Anthropologie weekend

Have you ever shopped the Anthropologie sale section? If you're an Anthro addict like I am, I'm guessing you have.

There's a special kind of rush to finding an amazing deal on an item from Anthropologie. Even if it's just a plate, bar of soap, or note pad. And it's completely addicting. I have to admit, as soon as I leave their store I'm wondering how soon is too soon to go back? Scary, I know.

These are this past Saturday's Anthropology sale finds:

A colorful seat cushion for my sewing room chair. How can you not receive creative inspiration when perched on a seat cushion from Anthropolgie? I mean, come on.


This is the other side:

and it even attaches with these colorful ties
It's new home.

How cute are these polka dot hot pads?
*they had a matching apron I had my eye on but literally as I was walking in the door, from across the room, I saw someone pick it up. And in the blink of an eye it was gone. Saturday Anthro sale shoppers are very quick. Note to self: even if you're not sure you want it, hold it until you decide.


And these beautifully hand screened, cotton towels.
I actually have other project ideas for these since they are dry clean only...who uses dry clean only hand towels?? They won't be towels for long.

I just loved the designs


And my final find, a tablecloth from $78.00 down to $14.98. But I didn't see it as a tablecloth. I saw it as an apron, a table runner, pillow covers,...after all, it is just a giant piece of fabric and who doesn't want something made out of Anthropologie fabric?! Remember what I did with that other tablecloth?


Well, I guess that wasn't really the last thing, since I bought my first Anthropologie shirt online when I got home. They didn't have my size in the store but they still had it online at the sale price. I'd had my eye on it since it first came out and was eventually going to try to make it myself. Lucky me!

Saturday, December 11, 2010

Sweater makeover: long to layered

I'll admit, I don't always follow the "if you haven't worn it in 6 months get rid of it" rule. I keep thinking at some point I might want to wear it again...but at every season's change I find myself pulling out the same clothes that inevitably will never be worn.

For example, I've worn this sweater a few times over the years, but since I never really felt that great in it, it has spent most of its time in the closet making me feel guilty for not wearing it. It was just a bit too long for my 5'4 frame and not very flattering.

So instead of tossing it, I decided to cut it up and re-fashion it.


So after cutting it into strips, finishing each raw edge with a zig-zag strip, and reattaching it in layers, this is what it looks like now:


The edges naturally ruffled with the zig zag stitch, and I kind of liked it.

The back needs a little work - I cringe when I look at that piece that needs to be snipped...but this is what the back looks like pre-snipped.


Other than that, this old sweater has new flair.
The shorter length is also much more flattering than long and drapey.

I guess I'll throw it back into the closet for another 6 months and see if passes the test!

Friday, December 10, 2010

Fleece hat: make your own!

You wouldn't believe how easy it is to make your own fleece hat.

Over the Thanksgiving holiday, we headed out to do some snowmobiling and I realized I didn't have a winter hat.

So instead of fighting the black Friday shopping rush, I pulled out some pink fleece material my sister had given me, and within about 20 minutes it was done.


Instead of following a pattern (which you can find free online in a bunch of places) I decided just to trace my husband's hat and modify it.


And it was not only cute, but kept my head and ears perfectly warm the whole time!

Okay, one action shot to show you I really used it.

Blogging tips