

Great pictures are key to showing people the best, most genuine version of what you've created - the look, the feel, the color, the texture.
Have you ever tried to post a sewing or crafting project online, but the pictures you take aren't doing it justice? Have you seen other projects posted that are hard to see due to their dim lighting and blurred photos?
It's a tragedy I tell you! I know how much time it takes for us to create our lovely creations.
Having been a photographer for many years, I wanted to share a few tips with you so you can take the best photos of the precious things you've spent so much time creating.
Tip #1: Use lots of natural light.
- Photography is all about light.
- Go outside with your project, if possible. A cloudy day with filtered light or a shady area on a bright sunny day are best (direct sun causes harsh tones and shadows).
Here's a little behind the scenes for this pillow-

A chair set out on the deck on a cloudy day. The outdoor filtered light wraps perfectly around each delicate ruffle.

- If you can't go outside, place your project by windows. You might still need a fill flash to avoid blur. When in doubt - turn your flash on. If you don't have enough light to work with and don't use a flash, you'll get blurry photos. Yuck.
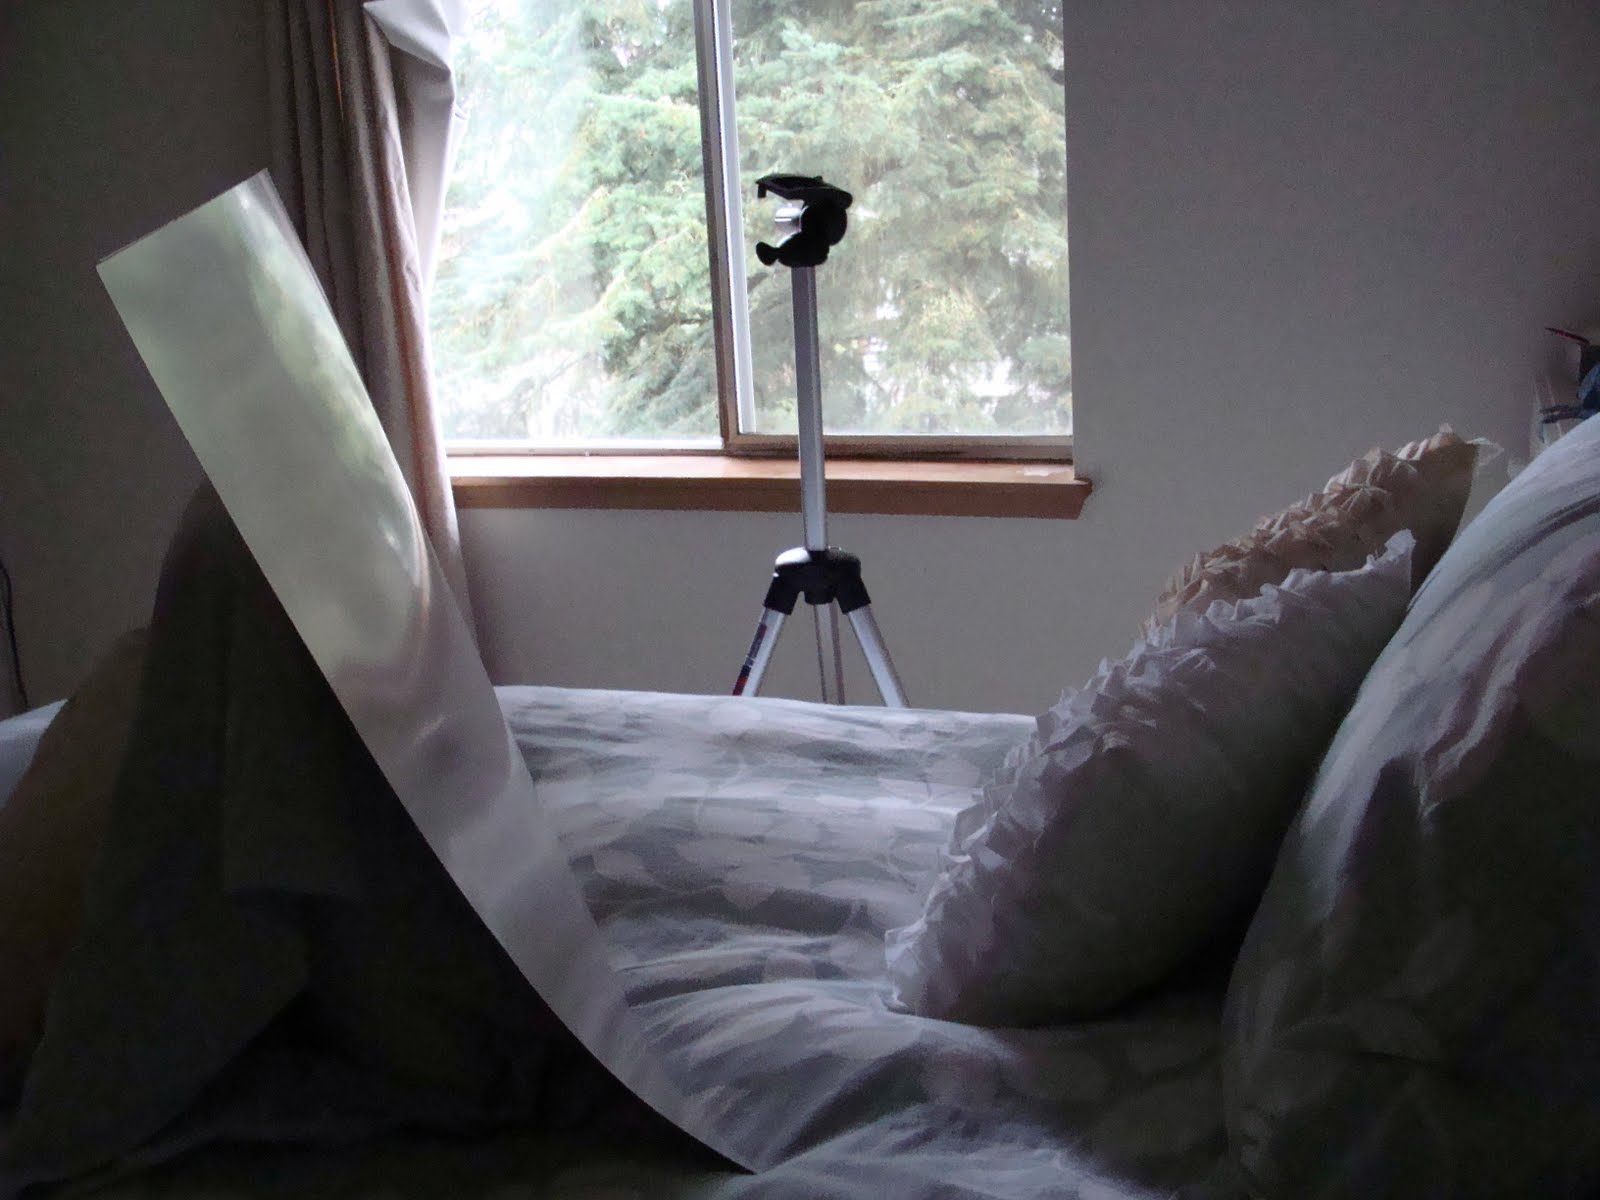
The shot below was taken with window light, a tripod and white poster board to bounce light back onto the pillows. Again, I love the way natural light softly wraps around the pillow detail.
 Here is the behind the scenes:
- When all else fails, if you can't go outside and don't have much light from windows, and can't wait until the next day for daylight, use a flash inside. *Bouncing light off of a white ceiling is best to avoid unflattering shadows.
Tip #2: Get in close!
- If you were in a shop and were interested in a pillow you saw across the room, would you continue admiring it from afar?

or would you walk up to look at it, hold it, feel it, study the details?
 You want your pictures to convey the details, the color, the texture, drawing them in, as if they had it right in front of them.
Tip #3: Try different angles and backgrounds
- Set up your project and take photos as you walk around it, get down low, stand up high, one side and then the other. Try different backgrounds. You'll be amazed at how certain angles highlight just the right details.

Tip #4: Take lots of photos
With digital cameras, we have the freedom of taking as many pictures as we want. Out of 15 pictures, you might find 3 or 4 that work really well.
 It's better to take a bunch of pictures and delete what you don't use, then have to re-do your photo shoot because you didn't get any great pictures.
Tip #5: Clean up your background
- You want your pictures to focus on your creation, not the messy room you're taking the picture in. Take a few minutes to set your surroundings up. Keep it clean and focused. Turn off overhead lights that might be omitting a yellow cast.
haha - this one is so bad in so many ways
 Focus on what you're trying to present. Ahhh, much better.
Other tools:
Tripod - keeps your camera stable, you can use it outside, it keeps your hands free, helps in lower light situations with the timer setting to avoid blur.
White pieces of large cardstock or foam board are great for bouncing extra light back into your project.
Use a photo editing program like Photoshop. These programs are great for lightening, darkening, cropping, enhancing or creating photo layouts. Try to take the best photos you can from the start, so you don't have to put all your time and energy into fixing bad ones.
If you have any questions about the tips and techniques I've discussed, please feel free to contact me. I'd be happy to help! Pass this tutorial along to your friends!
~Shannon
Linked to:
FingerprintsontheFridge
TrulyLovely
30Days
AllThingzRelated
SomewhatSimple
TotallyTutorials
ToolsareforWomenToo
FirefliesandJellyBeans
I LOVE your pillows with the ruffles on them! We are moving next month and I'm working on new bedding for the master bedroom. I think I'll make some cute ruffled pillows like yours. So cute! Thanks for following...I'm following you now!
ReplyDeletehi, i have so much to say to you!! First off, i am your newest follower! I love your blog! Truly love your pillows and would love to try to make some for myself. I am soo glad i ran across your blog because i take the worlds stinkiest pictures ever- believe me its true. so i am totally gonna try the poster board thing and hope that helps. thanks so much for posting this!
ReplyDeletehttp://divababies.blogspot.com/
Shannon, thanks for taking us "behind the scenes" in photography! Food shots are hard, especially step by step ones...food doesn't wait patiently like a cute ruffled pillow! Your tips are spot on and I'm just finally figuring out the white cardboard trick...Thanks!
ReplyDeletehey, i talked about you on my blog, i would love to do a better job, but i dont know how! thanks!
ReplyDeletehttp://divababies.blogspot.com/
Just what I needed! I've been wanting to take better photos and learn how but didn't know where to start.
ReplyDeleteThank you :)
p.s I'm following you now!
littlegirlsandpolkadots.blogspot.com
i;ve never seen the "behind the scenes" before. i had no idea! great tips. i need to pull out our honky tonk tripod more.
ReplyDeleteGreat tips! I have a friend who's a photographer and I'm always grilling her on questions, but then I never seem to listen to any of them when taking pics for my blog. So...must get a tripod and remember to use a sheet of posterboard or a foil-covered cookie sheet when inside!
ReplyDeleteI love your post. So many great tips. I can never seem to get good pictures of my Glass Kreationz. Thanks for the tips. Love your pillows, too.
ReplyDeleteGreat tips on lighting my items! I really needed some extra tips. Thanks so much!
ReplyDeleteWhat great tips. I just received a Nikon D7000 for Christmas and have really been trying to use it effectively? These tips are really useful, especially the poster board idea. Also I read to try and not use your flash if at all possible, so that is why I had blurry pic.
ReplyDeleteI love your ruffled pillows and am now a follower.
Hi Chrissy - I'm so glad you'll be able to use some tips from my tutorial!
ReplyDeleteI agree with you - if you're not using a flash and don't have enough light your pictures will be blurry.
I like to think of a flash as a "freeze framer". Once that flash goes off it freezes everything in your photo. So if you don't have a lot of light, you need to use a flash or you will get blurry pictures.
I prefer to be in a position not to have to use flash because natural light is so much better, but when you're desperate, sometimes you have to use it!
thanks for this tute on how to take pictures of our projects. Yes, it is a problem, a HUGE problem at night so I do all the picture taking during the day near a window. I've taken pictures at night without a flash and they turn out yellow. Yuck. I've had problems with backgrounds, too. In one picture I had a Joann Fabric bag in the background. :) thanks again, Linda
ReplyDeleteGreat tips, and thanks for all the example photos. I'm just getting into photography and every little tip helps!
ReplyDeleteGreat post! It's truly all about the natural light isn't it? I love how your pulled back to show the audience what the whole scene actually looks like. And that ruffle pillow is just lovely!
ReplyDeletereally good tips!!!!!
ReplyDeletehttp://babyemilycloset.blogspot.com/