 |
| Slip pockets: Tool Pouch |
I love little "extras" that keep things organized.
Adding slip pockets to the lining of totes, purses or pouches is a great way to keep the quick reach items handy, while keeping them separated from the black hole (aka the rest of your purse "stuff")....I know it's in here somewhere...
Adding slip pockets to my Ruffled Tote was the perfect way to separate my cell phone, keys and pens from the rest of my useless clutter necessities. (I used Method 1 for this purse)
 |
| Slip Pockets in Ruffled Tote on one side, zippered pocket on the other |
{2 methods}: Adding Slip Pockets to a Pouch, Tote, Purse or Bag
There are a couple useful methods I've used to add slip pockets to purses or pouches. You can also add them to existing totes, if you don't mind stitching showing on the outside.
Method 1: Top Stitch
For this method, cut the fabric for your pocket double the length, fold it over (right sides together) and sew it together, leaving an opening to turn it.
It will create sort of a tube of fabric
With your "tube" right side out, the fold at the top of your slip pocket, and the open section at the bottom - tucked together, Top Stitch your slip pocket to your lining, leaving the top open for your pockets. Add separating lines by stitching right down the pocket to create as many sections as you need.
 |
| Slip Pocket added to Ruffled Tote purse lining (Top Stitch Method) |
Method 2: Flip Up
I used this method for my Tool Pouch. I only used one layer of fabric, but you can sew a "tube" as shown above in Method 1 and follow this to add it to your lining.
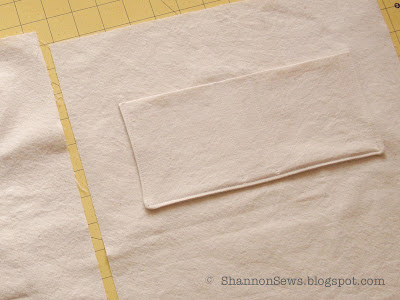
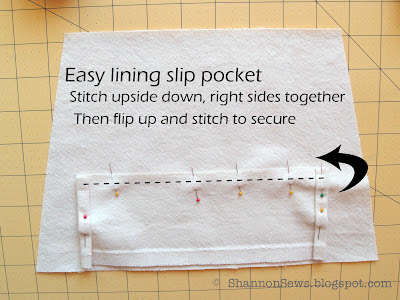
Take your tube or one layer of fabric, the length of your slip pocket and lay it upside down, right sides together. Fold in the side seams and stitch just along the bottom.
I also added a small zig-zag stitch to secure the fabric from fraying.
Now flip up your fabric
Pin the sides down (with seams folded under).
Top stitch just the side seams to secure
Add separating lines through the pocket and lining.
Adding slip pockets to your tote, purse or pouch really is one of the easiest pockets you can add for a bit more organization. Try it, you'll like it! I promise!
Never miss a post! Subscribe to ShannonSews
Like on facebook.com/SSorensenDesigns
Follow @ShannonSews1 on Twitter
Subscribe to youtube.com/ShannonSews


This is such an awesome idea and just what I was looking for - thank you Shannon!
ReplyDeleteI'm so glad it helped Katherine! Hope it came together perfectly for you!
DeleteThis is awesome! I'm a knitter and crocheter, and I'm making a few bags that I want to add lining and pockets to. This is the perfect tutorial for me, because I'm new to sewing but I can follow this! The pictures help a ton! Thank you so much! :)
ReplyDelete