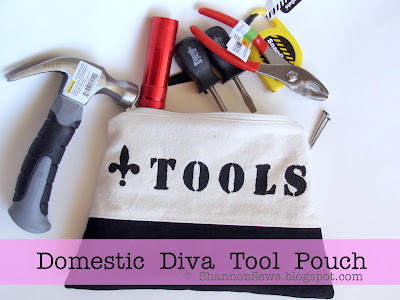
 A short time ago my beautiful niece left for her first year of college.
Wait. Wasn't it just yesterday I was in my first year in college? But if I'm still 18, how can she be....??? Dang. Reality bites my friend.
Anywho, as her goodbye party drew near, I wondered what I could give her that was both practical and thoughtful?
I pondered on what things I found I needed once I had flown the nest.
And of all things that came to mind? Tools. After all, a girl's gotta be prepared to deal with whatever comes her way.
Tools for our college student:
Small hammer, retractable tape measure, flashlight, tacky putty & nails to hang pictures, pliers, and screwdrivers (flathead and phillips). I didn't have one, but an Allen wrench may also come in handy for cheap college furniture assembly.
Assembling the Zipper Pouch with Lining and Slip Pockets
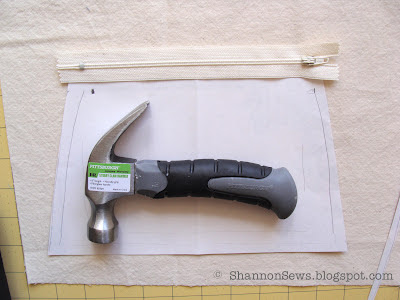
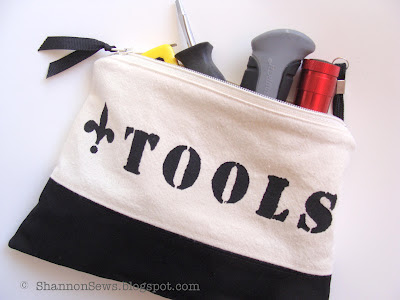
Now for the tool bag. The last thing I wanted was to give my niece a big bulky tool pouch to stuff in her over-stuffed car, so I measured the biggest item I had and created an economy sized pattern.
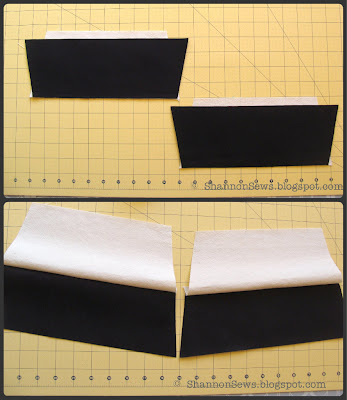
For this lined zipper pouch I cut a piece for slip pockets, two lining pieces, and made the outside two-toned using heavy weight cream and black cotton fabric.
The slip pockets easily fit the tacky putty and flashlight for quick access. I'll be sharing a quick tip on adding slip pockets to your lining, in a future post.
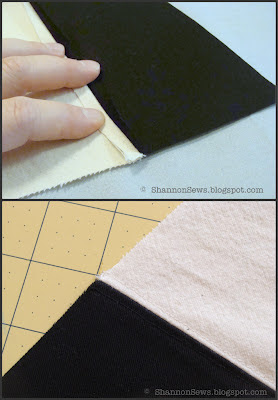
To create the two-toned zipper pouch front, I sewed the two-colored pieces right sides together,
ironed the seams down and top stitched with corresponding thread.
I referred to the fabulous How to make a lined zippered pouch tutorial from Skip to my Lou. She has a great tutorial showing the sandwich technique for putting linings, zipper and outer layer together.
Here's the finished lined zipper tool pouch - front and back
 |
| Lined Zipper Tool Pouch Front |
 |
| Lined Zipper Tool Pouch Back |
The zipper pouch lining turned out nicely - the slip pockets help with separation and storage.
 |
| Lined Zipper Tool Pouch Inside slip pockets |
A relief to see that it all still fit after assembly! hahaha
Okay, so I'm a little fanatical, but I added a little cover for the claw of the hammer. I didn't want my niece to stick her hand in the tool bag and scratch herself. That's what good Aunt's do.
My nephew was pretty impressed I fit all those tools inside such a small bag. My point exactly.
All zipped up, full of tools and ready to head off to college with her. If only there was room for one more thing in there...ME! We're all going to miss her but are so excited for her new adventure!♥
Never miss a post! Subscribe to ShannonSews
Like on facebook.com/SSorensenDesigns
Follow @ShannonSews1 on Twitter
Subscribe to youtube.com/ShannonSews
Linked to:
http://sewmanyways.blogspot.com/, http://www.iheartnaptime.net, http://www.flamingotoes.com, http://sewchatty.blogspot.com, http://www.thegirlcreative.blogspot.com
, http://www.ishouldbemoppingthefloor.com
, http://sewcando.blogspot.com, http://creatingreallyawesomefreethings.c
om, http://makingtheworldcuter.blogspot.com
, http://craftomaniac.blogspot.com, http://betweennapsontheporch.net/squirrel-wars-the-191st-metamorphosis-monday/http://www.cherishedb
liss.com, http://www.notjust
ahousewife.net/ http://www.hope
studios.blogspot.com/ http://
thecreativeitchboutique.blogspot.com/ http://todayscreative
blog.net/http://carolyn
shomework.blogspot.com/ http://www.craftyconfessions.com/ http://www.sugarbeecrafts.com/ http://www.linesacross.com/ http://diyshowoff.comhttp://www.diybydesign.blogspot.com/, http://www.733blog.com/,
http://www.sew-much-ado.com/, http://www.mygirlishwhims.com/, http://somedaycrafts.blogspot.com/, http://www.creationsbykara.com/, http://www.gingersnapcrafts.com/, http://www.rolleduppretty.com/, http://raegunwear.blogspot.com/http://ivyandelephants.blogspot.com/http://www.adornedfromabove.com, http://www.theshabbycreekcottage.com,
http://www.somewhatsimple.com/, http://www.aglimpseinsideblog.com/, http://www.houseofhepworths.com/, http://www.the36thavenue.com/, http://myricandreasen.blogspot.com,
http://www.thirtyhandmadedays.com, http://www.delicateconstruction.b
logspot.com, http://shabbynest.blogspot.com, http://www.504main.com http://seevanessacraft.com http://sarahdawndesigns.blogspot.com






what an incredible gift! not only practical, but so thoughtful and amazing you fit all that stuff in with pockets. brilliant!
ReplyDeleteThanks Emily!
DeleteGreat tutorial! I am a beginner in the sewing department but really love this pouch especially the fleur de lis.
ReplyDeletecasadesoria.blogspot.com
Hi Rachel! Thanks so much for stopping by! Good luck with your adventures in sewing. I was a beginner not long ago myself and have had so much fun learning new things. If you ever have questions, feel free to ask!
DeleteWhat a cute idea! Your pouch looks fabulous!
ReplyDeleteThanks for the tutorial!
Found you through the linkup! Would love for you to see the wreath I posted!
xo
SEL
growinglaughingandlovinginlife.blogspot.com
Hi! Thanks so much for your sweet comment! I'll hop over and see the wreath you made. xo
DeleteI didn't know you could make tool storage cute! That's awesome! I think I need one of these :) Such a great idea! I would love if you shared this at my Throwback Thursday party. I hope to see you there! :) http://www.hubbymademe.com/throwback-thursday-no-11/
ReplyDeleteHi Britni! Thanks so much for your sweet comment and inviting me to your link party. I'll be over shortly to check it out!
DeleteI'm so glad that I'm following you! I am in love with that tool pouch. What a clever idea! Thanks so much for sharing:)
ReplyDeleteKatie
www.funhomethings.com
Hi Katie - thanks so much for following and for your sweet comment. I'll be popping over to check out your website! xo
DeleteLove this idea! Now I want my own Domestic Diva Tool Pouch!
ReplyDeleteThanks for sharing @'Sew Cute Tuesday'. I'll be featuring you tomorrow, so be sure to stop by and grab a 'featured' button!
Hi Misty! What a great way to start the week! Thanks so much for featuring my tool pouch. You're the best! xo
DeleteHi Vanessa! Thanks so much for stopping by and inviting me to your link party. I'll hop on over and check it out!
ReplyDeleteHi Shannon,
ReplyDeleteThis is the cutest tool pouch. Thank you so much for sharing with Wednesdays Adorned From Above Link Party last week. This weeks Link Party is opened at
http://www.adornedfromabove.com/2012/09/how-to-make-natural-tinted-lip-balm-and.html
from Wednesday until Sunday.
Hope to see you there.
Debi @ Adorned From Above
www.adornedfromabove.com