I've been meaning to sew myself a bowl cover for my Kitchen Aid for eons. Every time I looked at that shiny silver bowl on the counter I felt guilty. Must. Do. That. Later.
Lets just say "later" never came, and I got really tired of washing the dust out of the bowl every time I used it.
Making your own bowl covers comes in handy, not only for covering your Kitchen Aid bowl, but they are great for covering all sorts of things - storing food in the fridge, taking a large salad for a potluck and oh, one more - you'll never guess. You can also use it to cover your head.
Yes, this simple bowl cover pattern is basically the same as a shower cap. How's that for a two-for-one?!
Okay, lets get started.
How to Make your own Bowl Covers
MEASURE
Trace around your bowl so you have the circumference. *You will be adding 1-2 inches around your circle for your pattern or you can choose to trace a bigger bowl than the one you're covering.CREATE YOUR PATTERN & CUT YOUR FABRIC
For your cover to fit, you'll need to add 1-2 inches to the diameter of your bowl. *You can either trace a larger bowl than the one you're making the cover for, draw in the extra room to your pattern, or add it when you cut out your fabric.HEM THE CIRCLE
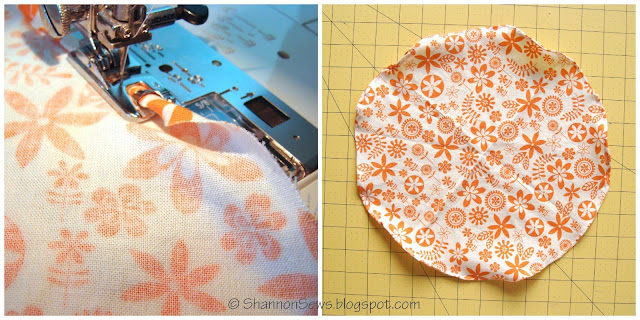
Hemming a curve or circle can be a bit tricky. I chose to use my rolled hem foot. Even with this tool it was a bit of a challenge. I found this great tutorial on How to Hem A Curve by adding some gathering stitches. I'll have to try it on my next bowl cover.STRETCH-SEW YOUR ELASTIC
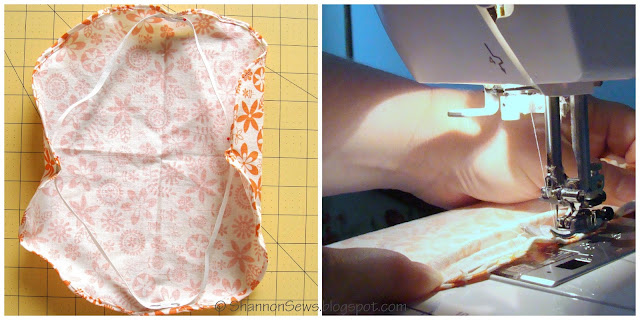
Instead of creating a band or casing to thread elastic through, I decided to stretch-sew it to the fabric circle.
1st: Measure and cut the elastic to the size you want (how tightly you want the bowl cover to fit).
2nd: Pin elastic in 4ths around the circle to get it evenly distributed.
3rd: Stretch only the elastic (not the fabric) in front and behind the presser foot, as you sew it in place with a zig zag stitch.
*The best tip is to stretch and sew little sections as a time to make sure you get the best elastic stretch.
ADMIRE YOUR HANDY WORK
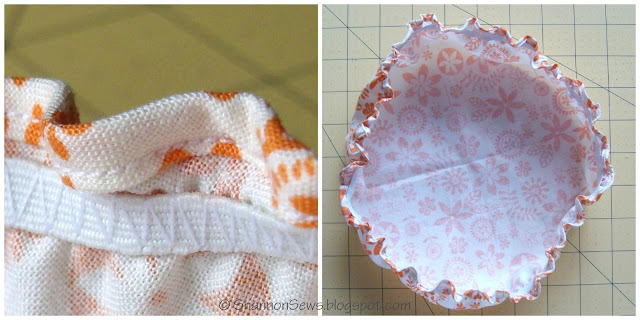
Just about ready to add it to my bowl. I love the dainty ruffled edge!
USE YOUR NEW BOWL COVER
Sigh. Now every time I catch a glimpse at my Kitchen Aid, I smile. My new bowl cover fits perfectly. I can hide away my Kitchen Aid tools and won't have a dusty bowl to wash. Hip hip hooray!Now it's time to sew a few more bowl covers...pot lucks, family dinners...left-overs...and maybe even a shower cap ;)
Never miss a post! Subscribe to ShannonSews
Like on facebook.com/SSorensenDesigns
Follow @ShannonSews1 on Twitter
Subscribe to youtube.com/ShannonSews


I made one too! Thanks for the advice! http://swinginmartinisdesigns.wordpress.com/2014/05/27/day-21-makeathingadaymay/
ReplyDelete