Monday, August 20, 2012

Sew an easy top or dress from two scarves

sew an easy shirt with two scarves
At the beginning of the summer I was on a mission to find 2 coordinating scarves to make into a swanky top, because of this tutorial.

I looked at every thrift store in town, but had a hard time finding them, until I stumbled on two matching scarves. Bonus!

They were 35x35 (larger than I wanted), but as it turns out, it's enough to even make a dress!


Okay, let's get to it.


Here's how I made a lovely breezy top 
from just two scarves 
(& a dress, just to show you how it's done).


find two thrifted scarves to sew into a shirt Start by finding 2 coordinating (or matching) scarves. My scarves are a soft polyester. Thrifted: $3.99 each.


Be sure to set your pressure dial to 1 (so your pressure foot is more gentle on the fabric) and use a small needle (I used a 9) so you don't leave holes in the delicate fabric.


sew shoulder seams but leave opening for neck
Measure how wide you want your neckline to be. Mine was about 10-11 inches.

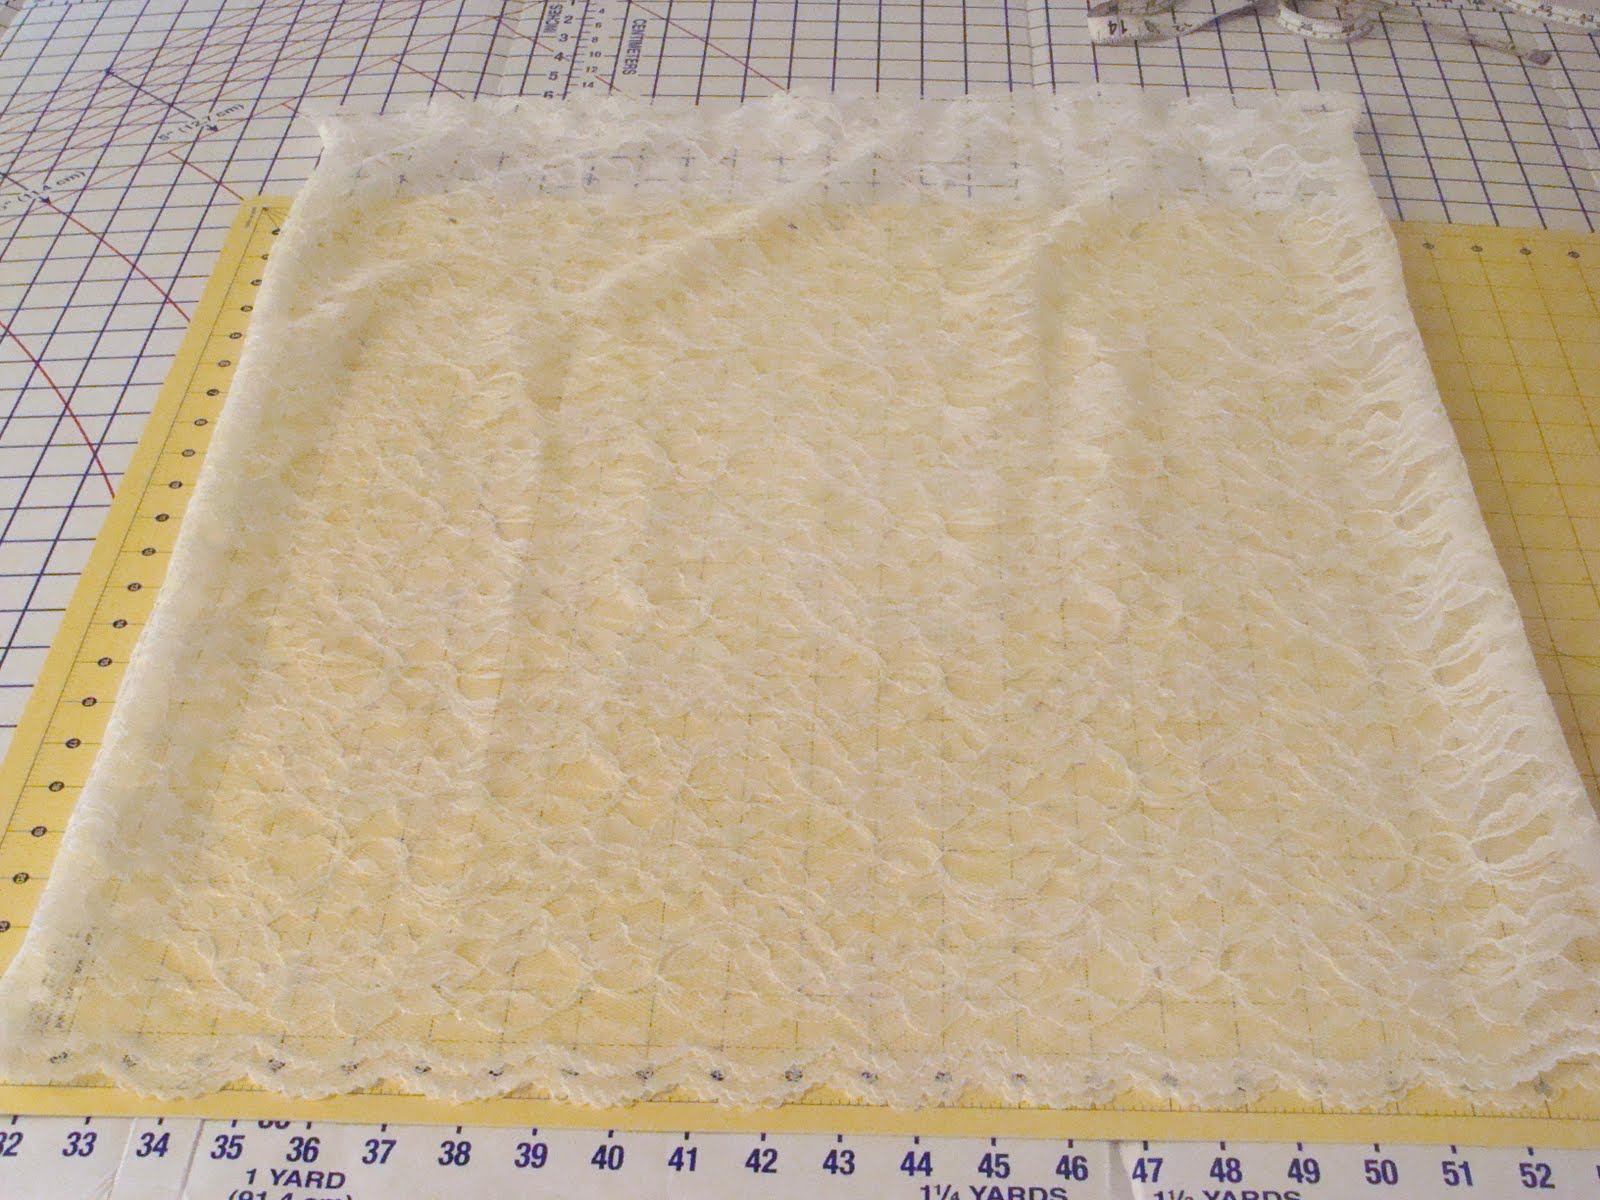
Put your scarves right sides together. Mark the center.

Using the neckline measurement, leave measured space open in the center. Pin and sew your shoulder seams.


sew up sides of scarf, leaving sleeve hole open
Next, measure how wide you want your sleeve opening to be and mark it so you know when to stop sewing.

Pin and stitch from the hemline up to stop mark.


Sewn dress made with two scarves
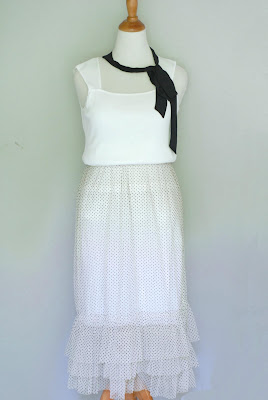
THE DRESS: If you wanted to make your scarves into a dress, you're all done (I tied a sash around it). Can you believe how easy that was??!! 

If I were totally hip I could see myself wearing this as a dress with dark purple leggings and black shoes.

Dang it! I'm not quite hip enough...so I'll be doing some trimming and turning it into a shirt instead.

But first, here are a few more shots of the dress, without the sash:

  
scarves sewn to make a dress is fashionably flowyWithout defining the waist, its pretty mumu flowy.  Some people can totally get away with that, but not me. I'm mumu enough as it is.


easy flowery shirt sewn from refashioned scarves
THE SHIRT: To make the dress into a shirt, it really is as easy as it sounds = Cut off the bottom.

And hem it. (blah). The purpose of this thrifty project was to find 2 scarves to easily sew into a top. There was to be no hemming. No hemming! It was almost all it was cracked up to be.

I ended up cutting off about 6 inches and hemming the bottom.
Then I added 2 belt loops on the side, to hold my sash in place (it's still mumu roomy without a sash).

Fashion flower pattern is in for fallI love the flow of it. And the flowery colored prints are right on for fall.

Top sewn from two scarves creates a delicate flowy feel

So feminine and pretty. I think I'll be wearing it with a black pencil skirt.
It even created it's own drapey cowl neckline. add belt loops to a shirt to hold a sash at shannonsews dot blogspot dot com

If you've made yourself a shirt or dress out of a scarf, I'd love to see it!
It's so darn easy. 
I'll be on the lookout for more square scarves, this time a little more my size (no hemming ;). ♥


Never miss a post! Subscribe to ShannonSews
Like on facebook.com/SSorensenDesigns
Follow @ShannonSews1 on Twitter
Subscribe to youtube.com/ShannonSews


Linked to:
Tip Junkie handmade 

projects

Wednesday, May 2, 2012

Easy Pajama Pants with Comfy Jersey Waistband - sew your own!

When I was about 13 years old, I remember my older sister trying to sew her own pair of red and white flowered cotton capris.

Unfortunately, they never made it past the sewing room floor. I'm not sure what happened, but somewhere down the line one leg ended up smaller than the other. It was quite a disappointment. That's the last time she ever tried to sew her own pants. And at the age of 13, I made a mental note never to try it either.


Flash forward...hu hem, a lot of years...and I decided to break the pants-sewing curse and take my chances on sewing myself a new pair of pajama pants.

Since I'm driven, curious, motivated, stubborn, or whatever you call it and insist on making it myself rather than following a purchased pattern, I consulted a couple of Pajama Pants Making sites:
Simple Pajama Pants Tutorial (for kids pj pants that I just modified) and Making Pajama Pants Part 1 video (you can also watch Part 2 if you want to use elastic instead of a t-shirt waistband). Check these out if you want to make your own, as they are more detailed than my how-to.
And based on what I learned, away I went.


First, I took an old pair of pajama pants to use as a "pattern". *Make sure you use a pair of pj pants you like the fit of! I made the mistake of using an old pair of jumbo jammies & ended up with a jumbo pattern that I had to cut way back.


I used wrapping paper as pattern paper, folded the fabric in half (right sides together) and cut both pieces at the same time. These giant pieces will be folded over for each pant leg.


Next, I sewed up just the straight part of the leg seams and then secured the fabric edge with a zig zag stitch to prevent unraveling (I don't have a serger.)


The pictures might be hard to follow, but in preparation for sewing the crotch seam (I've always hated that word), you put one leg inside the other to create a giant U shape that is the crotch seam (there I go again). Pin, and stitch it all the way around the giant U.


Tada! Here are my jumbo jammy bottoms before I cut them back and finished the waistband...not quite done yet.


As I told you, I made the mistake of using a pair of pj pants as a pattern that were way too big for me. Here, you'll see my pink pants that fit, against my new jumbo jammy bottoms. Oops. Had to trim/sew them back quite a bit. Save yourself the headache!


Newly trimmed pajama pants, ready for the waistband.
I opted for a very comfy t-shirt knit waistband. I simply cut a wide strip from a t-shirt and sewed up the sides. You want your waistband to fit snug, so the cut will seem small but trust me, it will stretch.


Since I was making a fold-over waistband, I inserted it -right side of band -inside wrong side of pants. Then pinned in four places: the front and back seams, and the two sides.


The trick with a jersey knit waistband is to stretch as you sew so it fits with the cut of your pant waist and pulls it all together at the same time.

After sewing the pieces together, I pinned it down and flattened/secured the seam with a zig zag stitch.


Then I folded it over to finish it off.
I just wanted a free fold so I didn't tack down the fold.


Hand made pajama pants can be hard to tell the front from the back, so I made myself a faux tag for the back.

All finished!!
These are the MOST comfortable pajama pants I think I've ever worn!  And I'm not just saying that.

Is it wrong to wear them out in public? I didn't want to take them off.


It's official. The pants-sewing curse is broken! 
Good triumphed over evil and all is well in the land.

P.S. There's a story about this soft, flowered cotton fabric: did you know it once was my favorite set of twin sheets? They're practically new since I bought them, as a single, for my twin bed...but swapped them out for a king sized bed and a husband. :) They're either Laura Ashley or Ralph Lauren, so with the high thread count, they're as soft as they sound. So far I've made a few pillow cases and pj pants. What's next?!~


Never miss a post! Subscribe to ShannonSews
Like on facebook.com/SSorensenDesigns
Follow @ShannonSews1 on Twitter
Subscribe to youtube.com/ShannonSews

Linked to:
Tip Junkie handmade projects
http://www.notjustahousewife.net/http://www.sugarbeecrafts.com/http://www.hopestudios.blogspot.com/http://thecreativeitchboutique.blogspot.com/http://todayscreativeblog.net/http://carolynshomework.blogspot.com/ http://www.craftyconfessions.com/http://www.diybydesign.blogspot.com/, http://www.733blog.com/, http://www.sew-much-ado.com/, http://www.mygirlishwhims.com/, http://somedaycrafts.blogspot.com/, http://www.creationsbykara.com/, http://www.gingersnapcrafts.com/, http://www.rolleduppretty.com/, http://raegunwear.blogspot.com/ http://www.theshabbycreekcottage.com http://www.somewhatsimple.com/ http://www.aglimpseinsideblog.com/ http://www.brandyscrafts.blogspot.com/ http://www.houseofhepworths.com/ http://www.the36thavenue.com/  http://thirtyhandmadedays.com/ http://www.delicateconstruction.com/ http://shabbynest.blogspot.com/ http://www.504main.com/ http://www.toysinthedryer.com/

Wednesday, June 22, 2011

Sheer Skirt Overlays: A tale of 3 skirts: part 3

Are you ready for part 3 of my tale of three skirts?

As you know from yesterday's post, I finished the white underskirt and black and white polka dot tulle ruffled overlay. Today, I am on to the 3rd skirt. A creamy lace overlay, utilizing the same white underskirt from yesterday.


This really might be one of the easiest skirts I've ever sewn.

I simply took my widest hip measurement, added a few inches, laid the lace folded over evenly (keeping the decorative edge on the bottom), and cut the dimensions I wanted for two panels.

Since the lace was folded over evenly, I just snipped at the fold to reveal two matching pieces for front and back.
At this point I should have sewn one of the sides of the skirt together before sewing over the elastic casing...but I was evidently too immersed in my project to think...so I sewed the elastic casing on first, to each of the two panels.

Have you ever sewn lace on lace? I haven't. It's a little slippery as you can imagine. So what worked for me was to lay the elastic down under the casing and just keep it there while sewing right next to it as a guide (not directly on the elastic).
When I was finished, I simply slipped the elastic back out.
And it worked for me so well that I used it as a form of stability when sewing the two sides of my skirt together (right sides together)...like this:

And when I was finished with one side of the skirt, I switched it to the other. It worked like a charm. Kept the lace in place, just where I wanted it.

Here is the skirt turned right side out. It's now ready for the elastic.
I threaded the elastic through with my handy dandy extra large safety pin.
And when I had pulled the elastic all the way through, I brought the ends together (wrong sides together).
And after sewing it together, flattened it and used a zig zag stitch to secure.
I slipped it back in the lace and did a little zig zag stitch right over the top of the opening. You can barely even see it. And since I plan on not tucking anything in to this skirt, what you can see doesn't matter.

Flash back to yesterday's t-shirt-to-skirt reconstruction...
This interchangeable skirt will now go underneath this lacy skirt overlay.
one plus the other =


I love how it turned out!
Kind of has an antique feel.

I have two more skirts lined up for this summer but still need to come up with the right designs for the fabric...but for today, I have to make a visit to Remlinger Farms to check on my shop inventory and see if any of my pillows, baby bibs/burp cloth sets, or aprons have sold!

Ciao for now!

Linked to:

Monday, June 20, 2011

Sheer Skirt Overlays: A tale of 3 skirts: parts 1 & 2

I have been wanting to do this skirt project since February(!) when I bought this polka dot tulle and creamy lace fabric.

I have seen so many cute skirts with sheer overlay that I wanted to make a couple for myself.


The first step was deciding how to make the under-skirt (the skirt underneath the sheer overlay). I decided to be really practical and make one basic white skirt that could go under both. Thrifty!

Part I - Enter: t-shirt-to-skirt-refashion

You won't believe me, but I'll tell you anyway. This XXL white turtleneck was only $4.00, plus 20% off at Kohls. I got it in February on the clearance rack. It screamed "I really need to be a skirt!" And I believed it.

Before I go any further, check out other tutorials for making t-shirt-to-skirt-refashions (I had a few hiccups along the way). These links are mainly for kids' skirts but you'll get the idea: Makeit-loveit - repurposing shirt into skirt; Sewlikemymom - the skirt skirt

Okay, back to my story. I dismantled the turtleneck by cutting the arms off for the waistband and cutting a larger piece from the body for the skirt. Sounds kind of gruesome but it was harmless, I promise.

Since the knit waistband stretches soooo much I cut it much smaller for a snug fit.
Here is the t-shirt waistband before being sewn on to the skirt body.
I cut just under the arm for the skirt.


Pin the waist to the waistband in 4 places (center, back center, sides) and stretch the waistband as you sew and it connects it nice and flat.

(please excuse the wrinkles)


Part II - Enter: polka dot tulle

I cut a piece of tulle that fit around my waist and hips plus about 4 inches and first, created a casing where the elastic would go.

I used a very small needle with the tulle and jersey knit - I think it was a 9.


I cut 5" strips for the ruffles
and ruffled the top edge with my machine on its widest length and tightest tension. I sewed three rows on the bottom of the skirt, leaving the raw edge showing because I liked the look.
I threaded the elastic through the casing

and sealed it in place.
I sewed a double stitch (double needle) down the seam so it would lay flat.

Enter: t-shirt skirt + polka dot tulle


I think the two were definitely made to go together. I love how it turned out.


Whew! Stay tuned for skirt #3!

Blogging tips