Monday, July 30, 2012

Skirt to Shirt Refashion - easy cowl neckline

Would you believe me if I told you this bright royal blue dolman-sleeved top with a ruffly hemline used to be a skirt?


What if I told you the skirt had actually started as an oversized robe-looking-dress on an Old Navy clearance rack?


Yes, it's true. I'm a refashioning maniac. If it were a cat, she'd have 6 more lives. But I think I'm done with 3.


How many of you refashion clothes and then find you don't wear them? I'll admit it. I've done it more than once. Speaking of once, I think I only wore this skirt once.

Want to see how easy it is to refashion a skirt to a shirt? Well, I'll show you! 
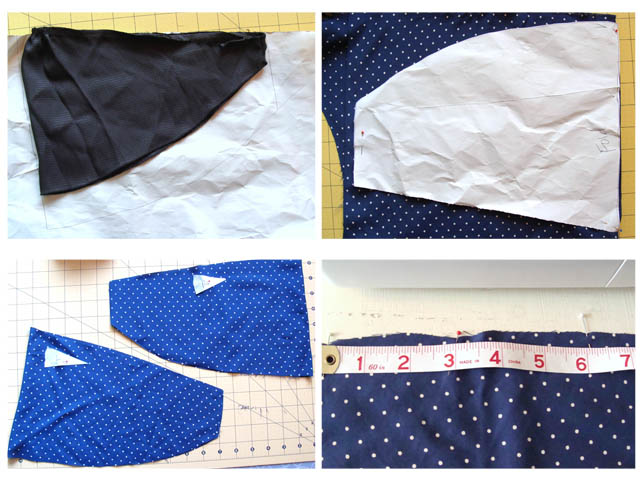


  • Snipped off the waist band and then re-cut with a straight edge.


  • Measure how wide you want the neckline by using a tape measure across your shoulders and/or check it against a favorite shirt. 
  • Find and mark the center (that's where your neck will go). Pin shoulders up to where your neckline will be and stitch. I think I left a 10 or 11 inch opening for my neckline.


  •  Next, from the shoulder seam down, measure how long you want your arm holes to be and mark.


  • If this were 2 big squares of fabric, I wouldn't need to pick the seams open, but since I'm using an existing skirt, I picked open the seams where the arm holes will be. I secured the spot with a few stitches just below the new arm holes.


  • Since the skirt hung square and full, I took in the sides based on an existing shirt. I folded both shirts in half, lined up all the seams, laid them down and trimmed. You can leave this part out if you like a fuller fit.

  • Pin together carefully without moving the shirt. It's hard to line jersey up again after moving it. Jersey likes to roll. And stitch it up.


And before you know it, you're done!


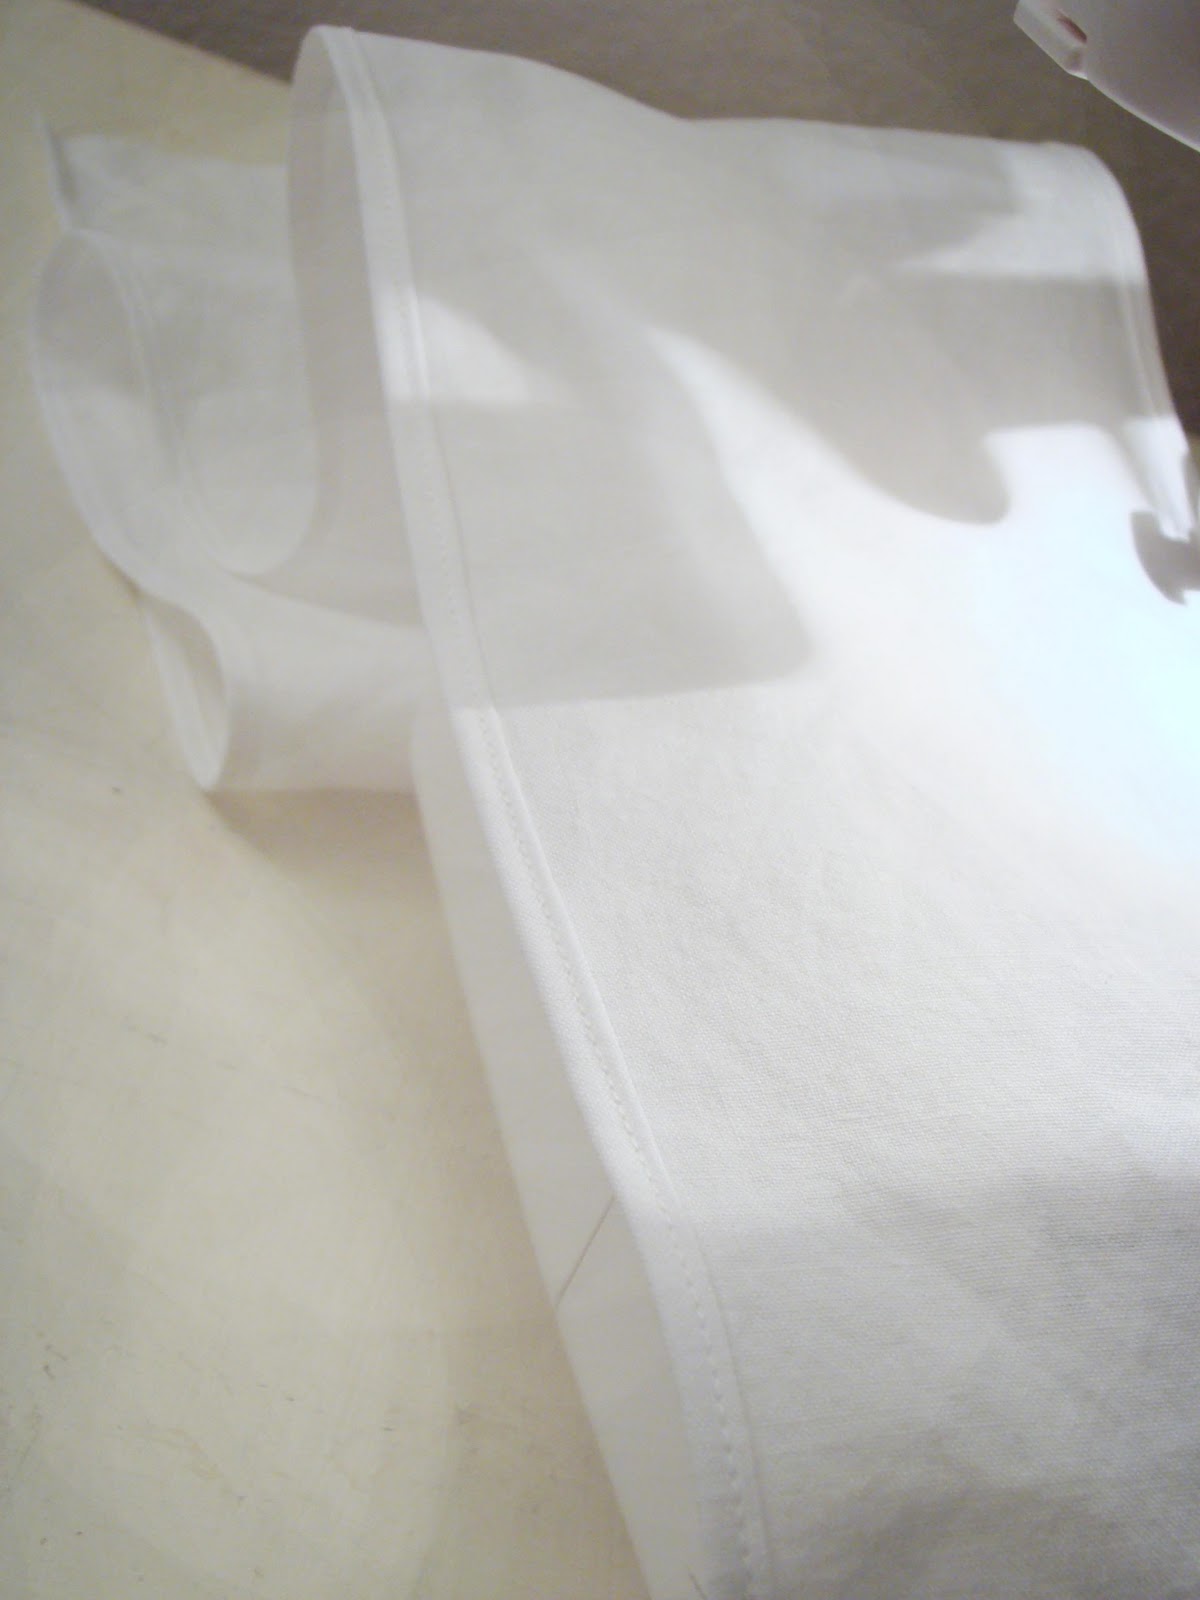
I love the soft cowl neckline. It just came naturally. 


This 3rd life suits it well.
I think I'll be wearing this one for sure.


Never miss a post! Subscribe to ShannonSews
Like on facebook.com/SSorensenDesigns
Follow @ShannonSews1 on Twitter
Subscribe to youtube.com/ShannonSews


linked to:
Tip Junkie handmade projects

Monday, July 23, 2012

Ruffled Crossbody Tote - with recessed zipper, zipper pocket & slip pockets

I finally got the guts up to sew my own purse. I've been craving a Ruffled Bag with a nice long cross body strap for forever, but have been too scared I'd botch it up (having never sewn a purse before).

As luck would have it, (& lots of helpful tutorials) I was pleasantly surprised at how it turned out!


Goodbye to the grody green purse I've been toting around for 12 months too long. My older sister has a particular distaste for it and tells me what it looks like. I'll give you a hint. It starts with a b and rhymes with scarf. I know. I never said it would be pretty. 


Anywho, back to my new ruffled bag... 

I hate purses that fall off my shoulders, so I made this bag with 1 wide/tapered strap that fits comfortably on my shoulder and across my body. I used a heavier weight natural cotton material and did not use interfacing because I like the slouchier look.


I created the ruffles by hand, much like I do with my shabby ruffled pillow cases, and secured the raw edges with fray check. The edge of the ruffles will still fray a bit, but I like the shabby look it creates.


I created square corners b/c I like the look and it gives it a tad more room.


If I was doing this purse making thing at all, I was doing it right. So even though I feared the inside zipper pocket, I put one in. And thanks to some fantastic tutorials, it was so much easier than I thought it would be! (see end of post for links). I also added some slip pockets for my phone, pens, etc. Love them.


Since I'm a bit fanatical about keeping my contents secure, I couldn't go with an open bag or magnetic snap. Although I dreaded it, I put in a zipper enclosure. It was a little tricky, but again, with the help of some tutorials I got it put in.


I just kept the back simple.

Now that I know I can sew my own purse, I'm craving making a few more! Like this cute Reversible Shoulder Bag from Lula Louise or maybe a lined zipper pouch like this from Skip to my Lou... We'll see.


Last step? Filling it with all my crap necessities. Now it looks more like my purse. hahaha


It takes a village to raise a child to help Shannon sew a purse! 
So as promised, here are some great resources I used to help me along the way.
*Putting in an inner zipper pocket and slip pockets 
Tutorial ~ Zippered and Slip Pocket Tutorial from Sew, Mama, Sew!
Sewing Zippers in Bags Tutorial 1. (aka Zippered inner bag pocket) from U-handbag
*Adding a recessed zipper to an existing purse or tote
Adding a recessed zipper closure to an existing purse or tote from Nancy Zieman
Adding recessed top zipper to purse/bag -Tutorial from Arm Candy for You
*Adding strap/sewing a tote bag together. *This also shows how to square your corners.
How to make a simple (reversible) tote bag: from Skip to my Lou

Other helpful tutorials:

If you have a tote but need to add a zipper to it:
How to add a zipper to an existing tote or bag: from Maiden Jane

If you're making a bag with a recessed zipper and straps on either side, this is a great tutorial:
Recessed Zipper How-to: from My Spare Time


Never miss a post! Subscribe to ShannonSews
Like on facebook.com/SSorensenDesigns
Follow @ShannonSews1 on Twitter
Subscribe to youtube.com/ShannonSews


Linked to
http://www.iheartnaptime.net, http://www.flamingotoes.com/, http://sewchatty.blogspot.com, http://cherishedtreasures-terry.blogspot.com, http://www.ishouldbemoppingthefloor.com, http://sewcando.blogspot.com, http://creatingreallyawesomefreethings.comhttp://makingtheworldcuter.com/2012/07/making-the-world-cuter/ , http://craftomaniac.blogspot.com, http://www.skiptomylou.org, http://youaretalkingtoomuch.blogspot.com, http://todayscreativeblog.net/, http://www.craftyconfessions.com/http://www.notjustahousewife.net/, http://www.hopestudios.blogspot.com/, http://thecreativeitchboutique.blogspot.com/ , http://carolynshomework.blogspot.com/http://offthegridat-30.blogspot.ca/2012/07/frugal-i-did-it-tuesday-2.html , http://www.sew-much-ado.com/http://www.mygirlishwhims.com/http://somedaycrafts.blogspot.com/http://www.creationsbykara.com/http://www.gingersnapcrafts.com/, http://www.rolleduppretty.com/, http://raegunwear.blogspot.com/http://sewmanyways.blogspot.com/ http://www.diybydesign.blogspot.com/  http://www.theshabbycreekcottage.com  http://www.somewhatsimple.com/  http://www.aglimpseinsideblog.com/ http://www.houseofhepworths.com/ http://www.the36thavenue.com/ http://www.504main.com http://shabbynest.blogspot.com http://www.thirtyhandmadedays.com/  http://tatertotsandjello.com/   http://www.delicateconstruction.com/ http://www.mineforthemaking.com/


Tip Junkie handmade projects

Wednesday, June 27, 2012

Bow Neck Polka Dot Blouse with Ruffled Hemline

It took me a while to decide what to do with this lovely blue and white rayon polka dot fabric. It was passed on from my mom's hands to mine, the day we reminisced over fabric.

I love polka dots, so I'm surprised that I've only sewn one other thing with polka dots. I pondered over this fabric a long time to figure out what I should make with it. And since I'm ridiculously obsessed with not using patterns, I didn't want to mess it up!

I'm happy to say that I love the way it turned out. It has kind of a sailor top flair.


The sleeves were probably the hardest part of this for me. Without a pattern, I think I made it harder than it needed to be. They turned out ok, but are a little more "pleated" on top than I would have liked. 

Here's how this little polka dot number came to life:
  • I used a fitted tank top for the bodice pattern.

  • And used a favorite t-shirt as a neckline guide


  • To finish the necklines, I created pieces that would flip over the back to create a smooth seam on the front.


  • Below, is how it looked after sewing it on, flipping it over and ironing it down. Instead of a zig zag stitch to secure the raw edge of the inside flap, I used fray check.

  • For the hem line ruffle I used a circle ruffle. I love circle ruffles! Gathered ruffles can be a bit bulky, and I wanted a more delicate ruffle. I love how softly it lays. 
  • I used a round lid to create the inner circle and a string and pencil to act as my compass to make the outer circle. I had to go back to high school math for this one! and use the Pi equation to figure out how big to make my circle. Instead of my garbled math explanation, see this easy how-to from Sweet Verbena.
  • Once the circles are cut and opened, you can see how nicely they lay. 


  • Next, I pulled out my hemmer foot and hemmed the ruffles; then pinned them right sides together to the bodice. 


  • Now on to the dreaded sleeve. Really sleeves aren't that hard, but I made it harder. I'm a glutton for punishment.
  • I copied a sleeve I already had taken off something else, but made it bigger. 
  • In order to fit the new sleeve in the armhole, I did a few gathering stitches on either side of the center top of the sleeve.

  • The point is to gather a bit on either side of the top center, until the sleeve fits nicely in the hole. I would have liked my sleeves to lay a bit flatter, but since I cut the sleeves a little too big for the arm hole, it meant I needed more gathers. And since I didn't gather it quite far enough on either side from the center, it gathered a little more than my liking at the shoulder. If that even makes sense. But it will do just fine.


  • Now for the hanging neck bow. This was just the finishing touch I was looking for.
  • I measured how long I wanted the ties, cut a couple matching pieces, ironed them in half, pinned, and sewed.  

  • Turned the ties right side out, ironed them flat, and attached them to the shoulder seams.


One of these days I may break down and actually buy a pattern. I'm guessing it's probably easier than re-inventing the wheel.

For me, it seems to be the challenge and test of my creativity that's got me hooked on doing it myself. But I seem to forget there's always a good dose of aggravation thrown in. But maybe overcoming it is what gets me to push myself harder??

Speaking of aggravation, I'm working on a tank top refashion right now, using a scarf as a sheer overlay. It's had its share of hiccups, but I will press on! Hope to share it if I survive. :)


Never miss a post! Subscribe to ShannonSews
Like on facebook.com/SSorensenDesigns
Follow @ShannonSews1 on Twitter
Subscribe to youtube.com/ShannonSews


Linked to:
Tea Rose Home

Wednesday, March 21, 2012

Clothes hoarder

I'm getting into a bad habit.
I clean out my closet and then keep the things I want to give-away so I can refashion them.

I can't help it. I see them as a stack of fabric. And heaven forbid I give away fabric.

And I have to admit it. I have two other stacks like this.
I'm so ashamed.


What if I cut up two shirts, and create a totally new one? What if I make a few alterations to an old sweater to totally transform it? What if I turn my old suede skirt into a stylish vest? The options are endless!

Some call it hoarding.
I call it keeping.

When I first started sewing, I had the re-fashion bug. Big time.
I refashioned a men's shirt to a skirt, a tablecloth to an apronadded big ruching to a sweateradded sequins to top or twoadded ruffles to t-shirts, and cut up a tank top to make one with tiered ruffles...

Oh heck, here's a link to all my refashions
Listing them separately is useless.
The real question is, what didn't I refashion?!

I'm currently working on a simple t-shirt refashion that I'll share with you once it's done. It's based on making a short t-shirt (that shrunk) a little longer. And no, this refashion doesn't use any of my left-over clothes. But someday I might just need them to do that!! hahaha Must. Keep. Clothes.


Never miss a post! Subscribe to ShannonSews
Like on facebook.com/SSorensenDesigns
Follow @ShannonSews1 on Twitter
Subscribe to youtube.com/ShannonSews

Monday, January 9, 2012

How to use a Hemmer Foot a.k.a how to sew a rolled hem

Okay, so as promised, I'll tell you a little more about using a hemmer foot to produce that lovely ruffly pillow I bragged about (the one I made my mom for Christmas).


I posted a while back about sewing with a hemmer foot to make this lovely pink frosting-like pillow case back in August.


But I have to admit, since that time I've gotten even better at using a hemmer foot and found a few tricks that help make practically perfect seams every time. I know, there I go bragging again. Bear with me.

I found some great tips on this video. I'm so much better at learning something when I can watch it and practice it. I watched another video and gleaned some goodness off of hers too, but for the life of me I can't find it again. Sorry nice lady!


Three of the best tips I found
for using a hemmer foot for a rolled hem-

#1. SLOW AND STEADY (take a chill and slow it down)
#2. Fold over material and finger-press to create a starter seam
#3. Help your hemmer foot do the work by continuing to fold over your seam & hold fabric taut


Okay, lets put these tips to work:

  • I folded over and created a start to the seam the same width as the groove in the hemmer foot (I used a 4mm).  This is cotton fabric, so pressing the seam down with my finger held it well.


  • I folded it over again and finger-pressed it. This became the start to the seam.


  • I put this seam directly under the hemmer foot and stitched a few stitches to secure it


  • Next, I pulled the fabric up and in the hold of the hemmer foot.


  • I continued to fold over the material as it feed through, while holding it taut (slightly-tight but not too tight). It helped guide the material through the foot neatly.


  • Here's me in action. Keeping the continuous fold, while guiding the material and holding it taut. (You have no idea how tricky it was to get this shot. What I won't do for my blog.)


  • Check out the left seam. Straight, straight, straight!


  • So precise. And practically perfect. What'd I tell ya?

  • Gotta love this technique!


It made sewing these ruffles so much easier.


Don't do it the hard way, give those sewing feet a try!


Never miss a post! Subscribe to ShannonSews
Like on facebook.com/SSorensenDesigns
Follow @ShannonSews1 on Twitter
Subscribe to youtube.com/ShannonSews
Blogging tips