Sunday, October 27, 2013

Ikea Swedish Meatballs Gravy Recipe {low-fat version}

ikea swedish meatballs gravy low fat recipe
A few days ago at dinner time, I found myself with 1/4 bag of frozen Ikea Swedish Meatballs, but no gravy mix. Gasp!

Not wanting to eat them dry, or drive the 45 minutes to Ikea just for gravy, I crossed my fingers and googled "Ikea Swedish Meatballs Gravy Recipe". And BAM! Like magic, it was there.

All I needed to do was use an online tool to convert ml to cups, substitute milk for cream, and test out my newly adapted recipe.

As I shared on Instagram, this swedish meatballs gravy recipe was a total hit! And it's healthier than the original by subbing milk for cream, and tastes like the real thing. No more gravy packets needed!

Here is the deliciousness, that is Ikea swedish meatballs gravy:
(sorry, not ambitious enough to make the meatballs myself. yet.)

Ikea Swedish Meatballs Gravy Recipe

*low-fat version adapted from the official Ikea Cookbook

Ingredients:
1/2 c milk (substituted instead of cream)
1 c beef broth
2 tsp soy sauce
1-1/2 Tbsp flour

Directions:
Heat broth & soy sauce in saucepan on the stove. Dissolve the flour in milk. Add milk/flour mixture to broth mixture. Bring to a boil & thicken. Simmer about a minute. Salt & pepper as needed. Serve with Swedish Meatballs and rice, boiled or mashed potatoes.

*This may be my new go-to for quick, delicious gravy for any meal!


Linked to:

party

SUBSCRIBE (never miss a post!): Subscribe to ShannonSews
BLOGLOVIN: ShannonSews on Bloglovin
FACEBOOK: facebook.com/SSorensenDesigns
TWITTER: @ShannonSews1
INSTAGRAM: ShannonSorensenDesigns on Instagram
SHOP: Shannon Sorensen Designs + Fairface Washcloths
YOUTUBE: youtube.com/ShannonSews

Saturday, June 29, 2013

Quick Easy Dinner Idea: No cooking required!

quick easy dinner idea meals for summer
Want a quick, easy and delicious summer meal idea? This is a great one I just had to share. And there is no cooking required. Say, what??

{Enter: King's Hawaiian Sweet Rolls} As I was looking through my coupons and stumbled upon one for King's Hawaiian Sweet Rolls, (6/30 Red Plum for you couponers), I had a dinner epiphany! Why not make an old favorite with a new twist? Forget regular old hamburger buns, bring on BBQ Chicken Sliders with the goodness of sweet Hawaiian rolls!

And oh, they were heavenly. Soft, sweet bread stuffed with moist rotisserie chicken, bbq sauce and crunchy cabbage (although you could top it with coleslaw if you prefer.) Mmmm mmmm good!

Okay, stop drooling. I'll show you how easy it is to throw these together (like I said, you literally don't have to cook a thing. Score!)


BBQ Chicken Sliders
on Sweet Hawaiian Rolls ❀


1 Rotisserie Chicken
1 package Kings Hawaiian Dinner Rolls
BBQ sauce
Ranch dressing (optional)
1 Bag coleslaw mix

Cut Hawaiian rolls in half and place them open on a plate. Break up the rotisserie chicken into bite sized pieces and place on Hawaiian rolls. Drizzle chicken with bbq sauce and ranch; top with a handful of crispy cabbage mix (or make coleslaw and add on top).
Put them all together and you're ready to eat. 
Oh. Yes. Please.
*Serve with corn on the cob and a fruit salad

easy summer meal with no cooking

I must say, this is now one of my favorite meals, especially for summer. It's so quick and easy, plus, you don't have to heat up the house. And for the first time this summer here in Seattle, we don't need to add any more heat to our kitchens. It's in the upper 80's here people! Shocker!


Never miss a post! Subscribe to ShannonSews
Follow ShannonSews on Bloglovin
Like facebook.com/SSorensenDesigns
Tweet @ShannonSews1 on Twitter
Subscribe to youtube.com/ShannonSews

Monday, June 10, 2013

Summer Meal Idea: Tortellini Salad

Easy summer recipe: tortellini salad
Quick, easy & delicious summer meal: Tortellini Salad 
We actually had some hot weather in Seattle this past week! Woohoo! Summer's on the horizon.

I opted for a quick and easy dinner that wouldn't heat up the house. From stove top and fridge to dinner table in just 15 minutes. Not too shabby.

There are countless ways to make this salad. The base is cheese tortellini and you can add whatever veggies you have on hand.

Toss it all with your favorite salad dressing, serve it with a side of french bread, and you're good to go!


Tortellini Salad Recipe

Ingredients
Frozen Cheese Tortellini
*Any of the following can be substituted with your favorite veggies
Cucumber
Tomatoes
Fresh Spinach
Carrots
Zucchini
Olives
Parmesan Cheese
Vinaigrette / Italian / or favorite Dressing

Directions
Cook frozen cheese tortellini according to directions. While tortellini is boiling, dice cucumbers and tomatoes; shred carrots and zucchini; slice olives; rise spinach and blot dry. Once tortellini is cooked, drain and rinse in cold water. 

Combine all ingredients and toss with your choice of salad dressing (I prefer this dill vinaigrette or Italian). Top with a scattering of Parmesan cheese (optional). 
Serve immediately or chill before serving. Goes well with toasted french bread.

Makes a quick, cool summer meal!


Tuesday, March 19, 2013

Make your own Rice Milk

So far, our gravitation to a whole grain plant-based diet has been going well. We're still trying to figure out new recipes to try, so we have a little more variety and aren't just eating a million and a half beans, but we're getting there.

In trying to cut out dairy (among the other animal-based proteins)  we decided to try making our own rice milk. And I have to say, I was pleasantly surprised at how much I liked it!

Rice Milk Recipe - How to make rice Milk

Some people prefer to cook the rice first, but I find the milk ends up a little on the slimy side that way.

I followed some suggestions to roast brown rice on the stove and soak it overnight, instead of cooking it, and found that I like that much better.

If you're trying to move away from dairy, or just want to see what all this rice milk hoopla's about, give rice milk a try. It's so easy to make and really does taste good.

After trial and error, here's the way we like to make Rice Milk:

Rice Milk Recipe 


Ingredients:
1/3 c brown rice
3 cups water
Honey or other sweetener
Vanilla

THE NIGHT BEFORE:
Toast 1/3 c brown rice in a pan on the stove until you start to smell its nutty flavor
Transfer the rice into a container with more than enough water to cover it
Soak toasted rice over night

THE NEXT DAY:
Pour out water from soaked rice and rinse the rice
Transfer the soaked rice into a blender and add 3 c water
Blend well
Gently pour blended rice milk through a wire strainer into a mason jar (some use cheesecloth)
Add honey to your liking
Add vanilla to your liking
Store in a sealed container in the fridge

I usually double the recipe and end up with two big mason jars.

EVERYTHING YOU NEED TO MAKE YOUR OWN RICE MILK:

[*click items to purchase -Amazon affiliate links have been added for your convenience. As an Amazon associate I earn a small commission for your purchase. We appreciate your support!]


What we've used rice milk on:

We've used our rice milk on cereal, added it to recipes, and used it in veggie/fruit smoothies.
It has just the right sweetness (after adding a touch of honey and vanilla) and has a very light taste.

You can also buy it at most grocery stores, but it's easy enough and much cheaper to make it right in your kitchen!


Subscribe to our Youtube Channel
See what else we do! Visit FairfaceWashcloths.com 

Friday, March 15, 2013

Ramblings from a sick bed

Sick day sarcasm
One minute your husband's sick and you're feeling a bit guilty for feeling so healthy...and the next? You're the one down for the count!

After 11 long days of plugged ears and sinuses, yesterday the heavens finally parted and my ears unplugged. Hallelujah! And yes, I could literally hear the angels singing.

Going back to work has been tough with the kids at school running circles around me. I'm still at about 1/2 speed. Good thing it's Saturday tomorrow!

WHAT I MISSED:
  • 2 sunny days in a row. Big deal for Seattle!
  • 4 days of work (yikes!)
  • 2 Sundays at church
  • Hearing
  • Breathing
  • Sleeping
  • Sanity

FAVORITE HOME REMEDY FOR SINUSES:
Steam treatments. Love them!
  • They can clear plugged sinuses in about 15 minutes and are quite relaxing. They didn't unplug my stubborn ears though. Boo!
  • Steam treatments even gave my skin a healthy glow (bonus!). I might make this a weekly ritual!

WHAT I WATCHED:
  • Thanks to our 2nd free Netflix trial, I had a load of baloney good flicks to watch.
  • I'm a little late to join the Downton Abbey obsession, but I'm officially hooked. Unfortunately, I only had season 1. Now I'm #698 on the library waiting list for season 2. Drat!
  • Mirror, Mirror
  • Adoption Terror (cuz, why not?)
  • Documentaries on food, veganism, vegetarianism, whole grain plant-based diets, environmentally friendly cleaning. 

WHAT I LEARNED:
The most surprising thing that came out of this sick spell, was what I learned about food and the changes I have stared making. I guess that's what happens when you're trapped in a sick house watching 6 straight hours of Food Documentaries.

My husband and I have decided to turn away from eating animal proteins (i.e. meat, dairy) and turn toward a Whole Grain Plant-Based Diet.

What totally resonated with me, was learning why it's not healthy to eat animal proteins. I've always thought it was just about eating leaner versions of cheese, milk, beef, chicken, & turkey, but what I learned, is that it's the animal protein itself that promotes disease and cancer cell growth in human beings, no matter how fat or lean it is.

Every time I ingest an animal based food, I'm ingesting the animal proteins that make up that food.

It suddenly all made sense to me.

For some, animal proteins may not have the same effects, but for me? From personal family health scares, it seems that my genes don't tolerate animal proteins very well.

You can reverse disease and other effects animal proteins have done to your body, by changing your diet to whole grain plant-based foods. So we're going for it! I have to say, it's great to have my husband totally on the same page with me on this. We've been able to shop together and come up with some interesting recipes to try.

Watch out world as a healthier Shannon emerges! ❀
xo


Never miss a post! Subscribe to ShannonSews
Like on facebook.com/SSorensenDesigns
Follow @ShannonSews1 on Twitter
Subscribe to youtube.com/ShannonSews

Wednesday, December 26, 2012

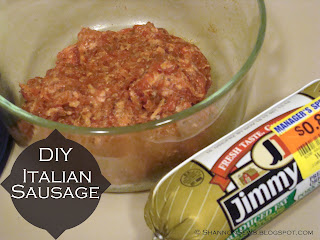
Make your own Italian Sausage

Make your own Italian sausage from plain pork sausageFor our big family Christmas Eve dinner festivities, we all decided to bring soups to share.

I've been craving a good sausage lentil soup lately, so that was my pick.

As I reached in the freezer for the package of sausage (one of my many great coupon finds!), I realized it wasn't flavored. Ugh. Please don't make me go back to the grocery store on the morning of Christmas Eve.

Thanks to an Italian Sausage Recipe I found online, I was able to turn my regular old pork sausage into flavorful Italian Sausage! The internet saved the day!


How to make your own Italian Sausage from regular Pork Sausage


In a glass bowl with an airtight lid, add the following ingredients and refrigerate over night:
(I only had just under 1 lb of pork sausage, so I halved the ingredients below, minus a dash)

2 lbs pork
1 Tbsp salt
1 Tbsp ground fennel seed
1-1/2 Tbsp paprika
1 Tbsp minced garlic
1 Tbsp sugar
1 tsp black pepper
3 Tbsp red wine vinegar

Mush ingredients all around in your raw pork and refrigerate over night in an airtight container to increase the flavor absorption. Cook normally the next day.


We even ground our own fennel seed with a mortar and pestle. Fancy, I know. It smelled SO good! Like licorice actually. I couldn't believe how fragrant it was.

Incidentally, the soup was a fiasco, so I'll spare you from that recipe. Midway through cooking, it seemed too bland so we added a bunch more flavorings. In the end, it ended up being way too salty and we didn't eat much of it. Drat! Note to self for next year's Christmas Eve dinner dish? Keep it simple!


Hope your holiday was happy and bright!


Never miss a post! Subscribe to ShannonSews
Like on facebook.com/SSorensenDesigns
Follow @ShannonSews1 on Twitter
Subscribe to youtube.com/ShannonSews

Sunday, December 23, 2012

Nutella Coconut Cookies: easy and delicious!

Nutella Coconut Cookies are a quick, simple chocolate cookie recipe
A couple nights ago my husband came home at 7pm and informed me that he signed up to bring a dish for tomorrow's potluck. Oh, and a couple dozen cookies.

For a brief moment I felt like the mother of a 2nd grader who was just told while tucking in her child,  "Oh by the way, I'm supposed to bring 3 dozen cupcakes for a class party tomorrow. Goodnight." I'm sorry, wha??

It wouldn't have been a huge deal, except for the fact that I was exhausted from being sick the past several days with a sore throat & stuffy head. Top of my list? Not so much baking batches of cookies.

However, having been home pinning things on Pinterest, uh ehm, recovering that day, I suddenly had a moment of IPR (Instant Pinterest Recall). Some call it a disease, I call it a miracle.

"Nutella Cookies! Only 3 ingredients! Bake for 8 minutes!", I blurted out as Pinterest took over what little brain power I had left.

Crisis averted. My sanity, and the potluck, were saved. Thank you Tasty Kitchen!

Nutella Coconut Cookies

*Revised from Tasty Kitchen's Nutella Cookies Recipe

These cookies are like a little brownie bite - lightly crispy on the outside and soft and chewy on the inside. If they weren't for the potluck I would have eaten all 24 of them!

Ingredients
1 cup Nutella
½ cup Sugar
1 cup All-purpose Flour
1 whole Egg
*we added 1 Tbsp water
*we added 1/2 c. shredded coconut

Preheat oven to 350 F. Blend all ingredients together well. Form into 1" balls. *I used a cookie scoop. Place on a cookie sheet. Press down firmly with the bottom of a glass. Bake 7-8 minutes or until set. *I ended up baking them for 10 minutes maybe because mine were a little thicker. Cool on a baking sheet.

Nutella cookies are easy chocolate cookies with a soft, chewy texture

YUM!
Bring these to your next holiday party!

Holly Berries Happy holidays from Shannon Sorensen DesignsHappy Holidays my friends!


Never miss a post! Subscribe to ShannonSews
Like on facebook.com/SSorensenDesigns
Follow @ShannonSews1 on Twitter
Subscribe to youtube.com/ShannonSews

Friday, August 31, 2012

Dill Vinaigrette Dressing Recipe: Make your own!

{image: acefitness.org}
Don't put away your summery salads just yet! In fact, this delicious Dill Vinaigrette Dressing is one you can use all year long.

For the longest time I bought pre-bottled salad dressings, even if I didn't love them. I hadn't really even considered making my own dressing, thinking it would call for too many ingredients I didn't have.

Turns out I had all the fixin's for this delicious dill vinaigrette and you might too!
Dill Vinaigrette Dressing

Ingredients

1/4 cup vegetable oil
2 tablespoons red wine vinegar
1 1/2 teaspoons white sugar
1/2 teaspoon dried dill weed
1/8 teaspoon salt
1/8 teaspoon onion powder
1/8 teaspoon garlic powder
1/8 teaspoon dry mustard
1/8 teaspoon ground black pepper

Directions

Combine the oil, vinegar, sugar, dill weed, salt, onion powder, garlic powder, dry mustard and pepper. Shake or blend until all mixed. Put in covered container and refrigerate. Serve chilled.


It's even pretty shaken up. Such a lovely pale pink. The dill and red wine vinegar give it just the right touch.


Never miss a post! Subscribe to ShannonSews
Like on facebook.com/SSorensenDesigns
Follow @ShannonSews1 on Twitter
Subscribe to youtube.com/ShannonSews

Friday, May 11, 2012

DIY Brown Bag Microwave Popcorn

I love popcorn.

Back when I was a kid, one of my favorite memories is when my dad made us popcorn fresh from the stove.

Oil, pot, popcorn kernels, butter and salt, and of course, our super-sized yellow tupperware bowl. He'd fill it to the brim with piping fresh popcorn and we chowed down as many handfuls as we could.

Realizing I ran out of microwave popcorn the other day, my husband suggested making popcorn in a brown paper bag. Ha! Whatever you say. (I'll be honest, I was doubtful. Shame on me.)

BAM! Turns out, it's just as good, if not better than the microwave popcorn you buy in the store. And it's cheaper overall. We bought a whole stack of brown paper sacks for $1.99 and a bag of popcorn for about the same price.

Okay, I'll get to it. You've got to try it for yourself.  
Here's what you need to make your own Brown Bag Microwave Popcorn:
  • 1 Brown Paper Sack
  • 1/3 c. dry popcorn kernels
  • between 1/2 to 1 Tbsp butter OR olive oil OR canola oil
  • Shakes of salt
  • Melt your butter or pour your oil in a measuring cup
  • Add kernels
  • Add salt
  • Stir around, coating all kernels

Pour your buttery/salty goodness right into the bag. I put a plate under the bag to prevent an oily mess.


Fold over the brown bag 3 times to seal. It will slightly unfold during cooking which is ok as long as its not all the way.


Put it in the microwave on its side for 3 minutes, but be prepared to stand by and listen to see when the popping starts to slow down. Mine took about 2-1/2 minutes or so. It can burn. So beware. Put your listening ears on.


When it first started popping it was like a happy surprise! It's working!!


Transfer freshly popped popcorn into a bowl.


Mmmmm...light and fluffy just like Orville makes it.


And if you time it right, only a few stragglers remain unpopped, just like in those "other" microwave bags.


So far we've made 3 different batches, trying for perfection.
  • Butter & salt = really good
  • Touch of butter + Olive Oil & salt = maybe even better than just butter
  • Just plain kernels, nothing added = burned. I'm still smelling it, thank you very much.

Make a new fun family tradition of making your own brown bags of microwave popcorn! Try different combinations, add different flavorings, and you'll get to eat the whole bag yourself! (That's the best part!)


Never miss a post! Subscribe to ShannonSews
Like on facebook.com/SSorensenDesigns
Follow @ShannonSews1 on Twitter
Subscribe to youtube.com/ShannonSews

Monday, April 30, 2012

Rice with a Coconut Kiss

Ahhh, Coconut.
The smell is like tropical island and sunshine.
The taste like sweet summer.
A Hawaiian delicacy perched in a tree.

I had never tried Coconut Rice until a few days ago. And don't even get me started on how much I liked it. I must have said it 1,000 times with every delicious bite.

The up side? Coconut oil is rich in a fatty acid. It's also been known to increase metabolism and strengthen the immune system. The down side? It's made up of more than 90% saturated fat. Oh yah. That.

If you're throwing caution to the wind, like I do from time to time, try this sweet side dish with a kiss of coconut. The lovely ladies from Sisters Cafe paired this coconut rice with Peanut Ginger Chicken & Mango Salsa. If you like peanut butter and a touch of ginger, you'll love the chicken. It was really good too. It complimented the coconut rice perfectly.


Coconut Rice (from Sisters Cafe)
2 c. coconut milk
1 ½ c. white rice
1 c. water
3 ½ T. sugar
½ t. salt

Combine the coconut milk, rice, water, sugar, and salt for the rice in a saucepan. Bring to a boil over high heat, stir once, then cover and cook for 18-20 minutes, or until rice is tender. Fluff with a fork, cover, and keep warm until serving. (You can also use your rice cooker.)


I have some really fun things to show you this week! I've been a sewing diva lately. From sewing my own cute pajama bottoms, to refashioning projects. Stay tuned!


Never miss a post! Subscribe to ShannonSews
Like on facebook.com/SSorensenDesigns
Follow @ShannonSews1 on Twitter
Subscribe to youtube.com/ShannonSews

Friday, April 6, 2012

Sugar Fest


You have no idea how long this Cadbury Caramel Egg and I have been having a stare-off. It's only a matter of time. I just found out a few days ago that they come with caramel.  After the couple weeks I've had, I deserve it.

My husband and I have gone through rounds of the flu that's going around. Bronchitis with fever. Sounds heavenly right? Oh, it was. I got it first and then gave it to him. In a moment of flu-induced-humor, I said, "Don't ever say I've never given you anything." At least one of us thought it was funny.

And just when I thought we were in the clear, my little 11-month-old-niece ended up in the hospital with a severe infection. Poor little peanut, all wired up like a baby in a cage in those awful metal hospital cribs. Broke my heart.

The good news is

  • I just found out my niece is returning home. I'm so thankful.
  • Spring Break officially started after I walked off the school campus tonight.
  • I have my own stash of Easter candy. And I'm going to eat all of it. Eventually, or all at once. I haven't decided yet.

Happy Easter everyone! Hope you enjoy your weekend. Save a little candy for yourself! You deserve it!


Never miss a post! Subscribe to ShannonSews
Like on facebook.com/SSorensenDesigns
Follow @ShannonSews1 on Twitter
Subscribe to youtube.com/ShannonSews

Wednesday, February 29, 2012

Fresh Fruit Juices: Juice it yourself!

The first time I tasted Odwalla fresh juices I was hooked. I think it was their Mango Tango that swept me off my feet on a warm spring day in San Diego. Sigh.

Flash forward to present day. Enter: Our own personal Juicer. And I don't just mean my husband, although he often does the juicing so I guess that kind of does make him my own personal juicer. Thanks, sweetie.


If you've never tried juicing your own fruit? You have got to try it.
The flavor is delicate and rich. It's as sweet as can be and goes down smooth. Like it's right off the tree.  It makes frozen cans of "fruit juice" taste like they juiced a big bowl of plastic fruit! Take that!

My husband bought this juicer a few weeks ago. I think it's called the Healthy Juicer. It uses pressure to push out the juice so there are no blades to worry about.


First you peel your oranges. Come on, it doesn't do everything for you. hahaha


Then you press down on the fruit as you turn the juicer handle.


It pushes the flesh of the fruit through one side while dripping the juice and pulp through the other.


You can either choose to keep out the pulp that has collected in the green tray, or just add it back in your juice like I did. Bring on the fresh pulp!


It's so good you might just cry a little. I did.


And the great thing about the Juicer is that you can juice almost any kind of fruit. So far we've tried pear, apple, orange, grapefruit and stawberries. I am over the moon for Pear juice. It's like putting a straw right into a fresh pear. Unfortunately, soft fruits like strawberries don't work. They only smoosh, they don't juice.

My husband juices veggies, but I can't quite stomach broccoli/celery/radish green/carrot/cauliflower juice. It's a little too "green" for me. I'm partial to the sweet stuff.♥


***************************************
DON'T FORGET!
Today is the last day (2/29/12) to 

Win it for yourself or for someone you know!

***************************************

Happy Juicing!


Never miss a post! Subscribe to ShannonSews
Like on facebook.com/SSorensenDesigns
Follow @ShannonSews1 on Twitter
Subscribe to youtube.com/ShannonSews

Tuesday, December 13, 2011

Vanilla Hot Chocolate: not just a Starbucks delicacy

My mom and I have a guilty pleasure.
Starbucks Hot Chocolate.

We love to go to "The Bucks" (that's what she calls it and now I'm copying her), get our fave's (she loves the peppermint and I love the regular) and we grab a cozy seat by the fireplace, cup our steamy chocolate, and talk and laugh the way best friends do.

But with all the fuss over Starbucks, did you know you can make your own Hot Chocolate Delicacy?? I kid you not.

The thing I learned about Starbucks' hot chocolate, is that they use vanilla syrup. I'm crazy about vanilla, so I decided to try a little hot chocolate magic of my own and see how it turned out.

Enter Vanilla Syrup.


Just get your favorite hot chocolate mix and a bottle of Vanilla syrup (*not vanilla extract - much too bitter). I've often found the syrups in the coffee section of most grocery stores.

I like to mix my hot chocolate with hot milk (for a creamier taste), but you can also use water with most mixes; and add a Tbsp or two of the Vanilla syrup. Start out small and add to meet your taste.

And what's a cup of hot cocoa without marshmallows?? You've gotta have some marshmallows. And while you're getting all fancy, you might as well drink it in your favorite fancy mug (it really does taste better in a fancy mug).


Hope you love it like I do! It sure sweetens the sting of that cold December air.


*Makes a great gift basket idea too!  Here's my address: (hahaha) J/K
Never miss a post! Subscribe to ShannonSews
Like on facebook.com/SSorensenDesigns
Follow @ShannonSews1 on Twitter
Subscribe to youtube.com/ShannonSews

Tuesday, November 29, 2011

Edible Creativity: Key Lime Pie

I hope you all had a fabulous Thanksgiving! As always, it seemed to go by way too fast. And I'm not just talking about scarfing down dinner. You know what I mean, you work on it for 10 hours, you eat it in 10 minutes? Crazy phenomenon.

I'll admit, after all the holiday hoopla it's a little hard to return to reality. However, on the bright side, the countdown to Christmas has begun!

For our holiday feast, I tried my hand at making a Key Lime Pie I found on allrecipes.com, per the request of my 17-year-old niece.  It turned out pretty delicious, if I do say so myself. Creamy and light with just the right tang.
And no egg yolks, like so many other recipes.
  • Condensed Milk
  • Sour Cream
  • And ok, I did cheat and use Key Lime Juice, unlike the die hard pie makers who juiced 40 limes with their bare hands.


But I did zest 2 fresh limes to make up for it


And made my own graham cracker crust (I get a few points for that too don't I?)
  • 1/3c sugar, 6T. melted butter and about 10 sheets of crushed graham crackers


Pre-oven pie
Fingers crossed...


We had a little extra filling and crust, so we made a little sample. I mean come on, we had to make sure the pie was ok to eat, right?!


And voila! It only took us about 6 slices before we got a skinny enough slice of lime to put on top. haha

The price of perfection.


And in case you want to try it, here's the recipe, with *my changes:


Key Lime Pie VII 

Ingredients

1 (9 inch) prepared graham cracker crust
*2 cans sweetened condensed milk
1/2 cup sour cream
3/4 cup key lime juice
1 tablespoon grated lime zest

Directions

Preheat oven to 350 degrees F (175 degrees C).
In a medium bowl, combine condensed milk, sour cream, lime juice, and lime rind. Mix well and pour into graham cracker crust.

[*Homemade graham crust: mix 1/3c sugar, 6T. melted butter and about 10 sheets of crushed graham crackers and press into pie plate. Bake for 5 minutes at 325, let cool a little, add filling and bake as the recipe states].

Bake in preheated oven for 5 to 8 minutes, until tiny pinhole bubbles burst on the surface of pie. DO NOT BROWN! Chill pie thoroughly before serving. Garnish with lime slices and whipped cream!


Never miss a post! Subscribe to ShannonSews
Like on facebook.com/SSorensenDesigns
Follow @ShannonSews1 on Twitter
Subscribe to youtube.com/ShannonSews

Thursday, November 17, 2011

A cookie riddle

When's a Samoa not a Samoa?
When it's a Coconut Dream.

Thank you Keebler.

It's safe to say I'm obsessed with Girl Scout Samoa Cookies. I anxiously await cookie time each year and commonly enjoy 2, 3, 4 boxes (who am I kidding)?

We ran across these Coconut Dream cookies the other day at the grocery store I had to do a double take. Fake Samoas? They couldn't possibly have the same caramely/coconutty goodness as the Girl Scout cookies do. Or could they?

Of course we grabbed a box. And I'm being honest. We only bought one.

And slap me senseless, they are SO close to the real Samoa's it has to be illegal! I mean really. Isn't it?  {I think I just heard a Girl Scout cry}

The thought that I don't have to wait a year for Samoa Girl Scout cookies anymore is both exciting and terrifying (for my thighs).

This discovery was much too good not to share with my fellow Girl Scout Samoa Cookie fans. You'll have to try a box and see what all this fussing is about!


Never miss a post! Subscribe to ShannonSews
Like on facebook.com/SSorensenDesigns
Follow @ShannonSews1 on Twitter
Subscribe to youtube.com/ShannonSews

Saturday, October 8, 2011

Silpat Giveaway

Love baking?? Then you'll LOVE this giveaway!

A friend of mine is hosting a giveaway on her blog for 2 Silpat mats to one lucky follower! Woohoo!

I'm secretly, or not so secretly hoping I'm the lucky winner, but why not invite friends??

Go to Frieda Loves Bread and find out how easy it is to enter. 
Offer ends midnight 10/16/11.

Good luck to us all!


Never miss a post! Subscribe to ShannonSews
Like on facebook.com/SSorensenDesigns
Follow @ShannonSews1 on Twitter
Subscribe to youtube.com/ShannonSews

Saturday, March 26, 2011

Mini doughnuts - too good not to be shared!


Are you drooling yet?


How about now?
*All photos courtesy of Frieda Loves Bread

A friend of mine, Frieda, from Frieda Loves Bread made the most mouthwatering little personal sized doughnuts...in three different flavors...seriously every time I look at these pictures I have to swallow. Hard. So I don't choke on my own drool.

For anyone who loves doughnuts as much as I do, you've got to try these recipes. They are scrumptious little pieces of heaven.

And, Frieda, if you're reading this, I hope you don't mind me borrowing these pictures from your website...these little gems were too good not to be shared!! :)

Click below for the recipes.
You now have permission to drool freely.

Blogging tips