Tuesday, February 10, 2026

These Black Face Cloths Are a Must for Airbnb & VRBO Rentals

Black flannel face cloths in a guest bathroom for Airbnb and VRBO rentals
AI-assisted image for visual inspiration

If you host an Airbnb or VRBO, you already know that small details make a big difference, especially in the bathroom. One of the most common (and costly) problems hosts face? Ruined white washcloths and towels covered in makeup stains.

There’s a simple, guest-loved solution that more vacation rental owners are switching to:

Black face cloths designed specifically for makeup removal.

The Hidden Problem With White Washcloths in Vacation Rentals

Foundation, mascara, self-tanner, and skincare products don’t play nicely with white linens. Even with bleach, many makeup stains never fully come out - leading to:

  • Frequent towel and washcloth replacement
  • Higher laundry and supply costs
  • Frustrated hosts and cleaning teams
  • Guests unsure what they’re allowed to use

Providing designated black face cloths solves all of this in one easy upgrade.


Why Black Face Cloths Are a Game-Changer for Airbnb & VRBO Hosts

Black face cloths aren’t just practical - they signal thoughtfulness and professionalism. Guests instantly understand their purpose, and hosts enjoy fewer stained linens.

Why Vacation Rental Hosts Love Them

✔ Black color hides makeup and skincare stains

✔ Soft cotton flannel is gentle on all skin types

✔ Designed for Airbnb, VRBO, and short-term rentals

✔ Reusable and washable, reducing waste

✔ Creates a hotel-style bathroom experience

✔ Protects your white towels, washcloths, and linens

Guests appreciate having a clearly designated cloth for their face, and hosts appreciate fewer replacements and better reviews.

Black makeup removal face cloths displayed in a luxury Airbnb bathroom
AI-assisted image for visual inspiration 

A Better Guest Experience (That Also Saves You Money)

Providing black face cloths shows guests you’ve thought ahead. It removes awkward guesswork (“Should I use this towel?”) and replaces it with confidence.

This small amenity:

  • Reduces accidental damage to linens
  • Helps cleaners reset bathrooms faster
  • Elevates your rental from “nice” to thoughtfully stocked

It’s one of those upgrades guests notice - even if they don’t always mention it.


Designed for Makeup Removal & Daily Skincare

Reusable black cotton flannel face cloths designed for Airbnb hosts

***THESE BLACK FLANNEL FACE CLOTHS by Fairface, are the top choice for VRBO, Airbnb and Vacation Rental Hosts

They are made from 100% cotton flannel, offering a soft feel that works for:

  • Makeup removal
  • Face washing
  • Daily skincare routines
  • Sensitive or delicate skin


Product Details

  • Color: Black
  • Material: 100% cotton flannel
  • Size: Approx. 12” x 12”
  • Feel: Soft, lightweight, breathable
  • Use: Makeup removal, cleansing, skincare
  • Packages: Comes in a set of 10 or a trial set of 3

They’re gentle enough for everyday use and durable enough for frequent laundering in busy rentals.

Perfect for Airbnb, VRBO, and Vacation Rentals

These black face cloths are ideal for:

  • Airbnb hosts
  • VRBO & vacation rental owners
  • Guest bathrooms
  • Eco-conscious homes
  • Welcome amenities and host starter kits

Whether you manage one property or several, this is an easy win.


The Small Upgrade That Makes a Big Difference

Black face cloths may seem like a small detail—but in vacation rentals, the little things matter most. They protect your linens, simplify cleaning, and make guests feel taken care of.

If you’re tired of stained washcloths and want an easy, affordable upgrade that guests actually use, black flannel face cloths are a must-have for Airbnb and VRBO rentals.


Add them to your guest bathroom and show your guests you’ve thought of everything - because the best hosts always do.

Order a set today to see if they're right for your vacation rental!

Monday, January 26, 2026

After Hernia Surgery: Best Abdominal Binder for Recovery

After Hernia Surgery - Best Abdominal Binder for Recovery
I shared in a recent post about the 5 Products that helped me the most after having a hysterectomy. 

Unfortunately, 8 months after my hysterectomy, I was in the hospital again having hernia surgery, to fix a hernia caused by my hysterectomy. A long, frustrating story for another day.

Since one of the vital parts of healing from hernia surgery is wearing an Abdominal Binder, it is very important to find the best abdominal binder that is the right size, right comfort and right fit for you. I thought it might help to share my favorite abdominal binder in case you are going through a hernia surgery yourself (and if so, I'm sorry about that!)

 [*Disclosure: This post contains Amazon links. As an Amazon Associate I earn from qualifying purchases.]


Finding the Best Abdominal Binder After Hernia Surgery

[Disclaimer: This advice is based on my personal experience. Always consult with your surgeon or physician to discuss what's best for you.] 

Why You Need An Abdominal Binder After Hernia Surgery

An abdominal compression binder helps hold everything in place, while applying pressure where it is needed, to keep the area as stable as possible while it heals. FYI, I am still wearing mine as I write this post. One more month to go!

All Abdominal Binders Are Not Created Equal - Size & Fit Matter

I was initially give an abdominal binder at the hospital after my hernia surgery, but it was far too large for me. The measurement from the bottom of my abdomen up to my rib cage was shorter than the length of the binder, so it didn't fit right nor did it apply the centralized pressure needed. 

My surgeon tried cutting panels off to make it shorter, but by the time I left the hospital, it was literally falling apart. I needed a high quality, properly fitting abdominal binder, that I could count on once I got home from the hospital and started to heal from my hernia surgery.

I jumped on Amazon and ordered 3 different abdominal binders / belly bands / compression bands but ONLY

>  THIS Abdominal Binder on *Amazon fit the best (click to purchase) Not only was it the most comfortable, it also fit the best and offered the right kind of support that I needed. If you are a female having hernia surgery, trying this binder is a great place to start! (*As an Amazon associate I earn a small commission from purchases made through my link)

abdominal binder worn after hernia surgery

Abdominal Binder Product Details:

  • 6", 2-panel compression wrap 
  • Support belt for hernia, back pain and muscle strain (my sister also wore one after child birth) 
  • Latex free 
  • Made in the USA 
  • Choose the right waist circumference for the length that fits you best

More about why this is my FAVORITE post-hernia surgery abdominal binder:

  • It is my favorite abdominal binder after comparing it to 3 other binders!
  • It got to me quickly, which was important after surgery
  • It is 6" and fits me perfectly and offers compression in the exact area needed
  • It is made of what feels like a comfortable stretchy material, almost like a really wide piece of gentle, comfort stretch elastic (other brands were very stiff and uncomfortable) 
  • The velcro closure makes it easy to adjust
  • It stays in place well and doesn't roll or shift
  • I choose to wear an undershirt and put the abdominal binder on top of that (not directly on my skin) and that makes it comfortable for me
  • Highly recommend!


Having Hernia Surgery it hard enough, so make it that much easier on yourself and have the right abdominal binder at home waiting for you when you get home from the hospital (or better yet, bring it with you so you'll have it on hand in the hospital!). 

This is a great abdominal binder, so buy it now so you'll have it on hand. 

I hope you find it helpful for you too! 

Best of luck with your surgery and healing!

If you have any questions, drop it in the comments!

Saturday, January 24, 2026

DIY: How to Clean Toilet Stains and Look New Again!

toilet before and after stain removal
If you are wondering how to get stubborn toilet stains out of your toilet bowl, you've come to the right place! 

[*Disclosure: This post contains Amazon links. As an Amazon Associate I earn from qualifying purchases.]

How to Clean Toilet Bowl Stains So It's Like New Again!

Stains can form on the inside of your toilet bowl over time, that are just too hard to get out with regular cleaning products. 

On the well water system where we live, our toilet bowl consistently ended up with dim brown residue that stained the toilet bowl. We tried to get these toilet stains out with natural products, regular cleaning products, and even scrubbing our toilet with bleach cleaners, but nothing really seemed to make a difference. The stains didn't budge and we figured eventually we would just need to replace the toilet.

It was only after my husband found the right product to deep clean our toilet with, that our toilet bowl looks almost new again! I was shocked!


How to Clean Toilet Bowl Stains Fast 

CLR Toilet Stain Remover Product
CLR Brands® Calcium, Lime & Rust Remover (*BUY HERE) is hands down, the best cleaning product we have found to remove toilet bowl stains. (*Amazon link: As an Amazon associate I earn a small commission on purchases made through my link) 

Try it and you won't be disappointed.


Here are some tips that helped us get our toilet bowl so clean, it looks almost new:

FOR BEST RESULTS YOU NEED-

  • Bottle of CLR (linked above) 
  • Disposable gloves
  • An old rag you can throw away

How to clean your toilet bowl stains with the BEST results:

CLEANING METHOD 1:

  • This method gave us the best results. If possible, empty your toilet bowl and let it dry. Do this by turning off the water to your toilet (or the main water) and then flush the toilet so it's empty of water. Let the toilet bowl dry before applying the solution. 
  • Put on your disposable gloves
  • Pour some of the CLR on your rag and wipe the dry, stained toilet bowl directly. You will immediately see a difference as you wipe the solution on the stains.

CLEANING METHOD 2:

  • If you are not able to empty your toilet bowl water, you can- 
  • Put on your disposable gloves and 
  • Pour some of the CLR solution directly into the toilet bowl (read instructions on the bottle) and
  • Let it soak for about an hour and use a toilet brush or rag to wipe the bowl as needed. 


Did you try it? 

Leave a comment and let me know if it's the best toilet cleaning product you've ever used, to finally get rid of those annoying toilet stains!

++++++


Is your Toilet Seat also in need of a fix? See our Popular Post: DIY Fix: Paint your toilet seat so it's like new again!

before and after toilet seat painted

Thursday, January 15, 2026

How to Prevent Foggy Car Windows: Best 2 Products that really work

Foggy car window photo Don't drive without this - Best 2 products to keep your car windows from fogging up
If your car windows keep fogging up, like ours did, making it hard to see while you're driving, you need to read this post. 
[*Disclosure: This post contains Amazon links. As an Amazon Associate I earn from qualifying purchases.]

Don't Drive Without This

One night while driving across a dark, snowy maintain pass, the snow and cold were so relentless, it kept fogging up our windshield to the point that the heater's defrost just could not keep up. All that was left to see through, was a small area on the windshield, which made for a very scary, dark and unsafe drive. 

Immediately after getting home, my husband started looking up products that could help us to never encounter that dangerous situation again. 

Thankfully, my husband was able to find and test 2 products that not only- 
  • help keep the windshield and other car windows clear from fogging up
  • but also minimizes the moisture inside the car 
We have never driven without these 2 products again. And because they worked so well at keeping our car windows from fogging up, I knew I had to share them with you! I hope they give you the same peace of mind (and added safety) they have given us. 

How to Prevent your Car Windows from Fogging Up (best 2 products that really work!)


rain-x anti-fog ends fogging and steaming of glass and mirrors
1. Rain-X AF21106D Glass & Mirrors Anti-Fog Treatment, Prevents Fogging & Steaming on Windshield and Visors, Improves Visibility, Great for Auto & Home 
(*Amazon link)


This has to be my very favorite product for preventing foggy car windows and increasing safety while driving! You wipe it on the inside windshield of your car (+all the windows if you want to) and as if by magic, it keeps the windshield from fogging up! I am a HUGE FAN of all Rain-X products and this did not disappoint!!

2. Moisture Absorbers (Fragrance Free) (*Amazon link)


I was surprised by these little moisture absorbers. We've used them in closets before, where they worked well, but I never thought to put one in our car. Turns out, they work just as well in cars!

moisture absorbers to draw away excess moisture in cars


The filter draws in and traps excess moisture, over time the beads dissolve into liquid, and the moisture collects in the base of the container. Once all the beads have dissolved into liquid, you replace the container with a new one.

**I prefer the fragrance free moisture absorbers, but there are options for scents if you choose.


3. Chemical Guys Professional Grade Premium Microfiber Towels for Cars (Optional extra) (*Amazon link)

It's best to wipe the Rain-X anti fog on with a microfiber towel to prevent lint or scratching. This brand is a good one if you're looking for a few good quality cleaning cloths for your car.


Safety while driving is the # 1 priority for all of us, and now you can have the peace of mind to know your vision will never be compromised due to a foggy windshield.

These 2 products have helped us so much this winter, and are the perfect solution for preventing foggy car windows and excess moisture inside your car, which can help prevent unsafe driving conditions. 

Have you tried them? Let me know! I hope they help you as much as they've helped us!

Wednesday, October 22, 2025

Top 5 Must-Haves After a Hysterectomy

If you are facing a hysterectomy surgery, being prepared before your surgery with what you will need after your surgery, will be a true gift to yourself while you rest and heal.

I wish I had known what products could help me the most after I got home from the hospital from my hysterectomy, so I decided to share the top 5 items that helped me the most after my hysterectomy and I hope they help you too!

[*Disclosure: This post contains Amazon links. As an Amazon Associate I earn from qualifying purchases.]

Why I needed a Hysterectomy

There are many reasons why a woman may have a hysterectomy. For me, it was a scary reason. 

After months of difficult symptoms that no one could figure out, a CT scan finally revealed a large grapefruit sized cyst on one of my ovaries that was "suspicious for malignancy".

After lots of worry, crying and praying, my hysterectomy / exploratory surgery day finally arrived and left me with one large vertical scar, 2 less ovaries and 1 less uterus. 

Thankfully, the results of my hysterectomy were benign and the only follow-up I will need is to check my cancer antigen every year to make sure I am cancer-free.

Whatever your reason for a hysterectomy, taking good care of yourself after your surgery is vital to a successful recovery.

Top 5 Must-Have Products After Having a Hysterectomy 

*Keep in mind, if your hysterectomy surgery was like mine, with a large incision, you won't be able to shower for a few days afterwards and you won't be able to bend over or lift for several weeks. Your experience may be different than mine but I hope you still find these products helpful.

What 5 products helped me the most after my hysterectomy, while I healed at home (in no particular order):

Helpful products for hysterectomy's


1. Electric Heating Pad - Buy now on Amazon

This flat heating pad helped me immensely after coming home from the hospital after my hysterectomy. I had to spend many days and nights in bed, laying on my back which would leave it aching. Having this under me all the time so I could leave it on or turn it off, was a huge comfort to my back, and also helped keep me warm. 

2. Stretchy nightgowns & Comfy house dresses - Buy now on Amazon

Since I couldn't wear anything that pressed on my belly or hysterectomy incision, I lived in these nightgowns and dresses for weeks! This brand is my very favorite because they are so comfy, stretchy, and soft. I got 3 of them and just kept rotating. I actually wore one of them to my post-op visit because it looked enough like a dress.

3. Long Leg Warmers - Buy now on Amazon

Trust me, you'll need these! Since you can't wear anything pressing on your belly / incision, you'll be wearing nightgowns or dresses that leave your legs exposed. Socks just don't cut it! These are like a warm sweater wrapped around your legs as high as you need them, and keep you feeling snuggly and warm. Ahhh. Best buy!

4. Grabber / Reacher Stick - Buy now on Amazon

This came in handy all the time! It is a very helpless feeling to drop something and not be able to pick it up. I did this over and over again and it was very frustrating until I got one of these grabber/reacher tools. This is another Best Buy for sure!

5. *Soft Face cloths (Buy now on Etsy)

One thing that really comforted me while in the hospital and the first couple weeks after coming home, was to have a warm, soft face cloth to wipe my face with. Since I couldn't bend over the sink for a while, I would use a touch of face wash to rub all over my face and then gently wipe it off with a warm, wet, soft face cloth. Fairface Washcloths are the only cloths I will use on my face and it honestly felt like heaven.

If you've had a hysterectomy or other abdominal surgery and have some must-have products that really helped you, share them in the comments!

+

You might also like this related post: After Hernia Surgery: Best Abdominal Binder for Recovery


Monday, October 6, 2025

Easy DIY Way to Make Extra Money

how to make extra money the DIY way
If you are looking for a Do It Yourself way to make extra money, without having to go work for someone else, or learn a grand new marketable skill, this is an easy DIY way to start earning some extra money right away! 

You can make anywhere from $250 to $1,000 a month to start, and more. I'm sharing this with you, because I did it myself and it works!

Step-by-Step DIY Way to Make Extra Money

The easiest way I've found to make extra money, while doing it myself, is to open a Poshmark Closet and resell clothes and goods I'm no longer using. I am shocked at how easy it has been to make extra money doing this. I kick myself daily for not starting this years ago when everybody was talking about it!!


How to Get Started: 

reseller guide for earning extra money Doing It Yourself
1st:
 Get *THIS Reseller Guide & FREE Facebook Support Group
 (affiliate link) 

This guide helped me get started so I could start making extra money right away. It takes all the guess work out of it and tells you everything you need to know. 

PLUS it comes with a FREE Facebook Support Group where you can ask questions whenever they come up and always get an answer. This has helped me a lot!

Another reason I chose this guide because its creator was an overwhelmed registered nurse who was able to start a reselling business, leave her stressful career, and never looked back. 

She shares everything she learned to become successful, and makes it SO much easier to get started rather than trying to figure it out on your own. And in reality, it is so much less intimidating than it seems. I highly recommend getting the guide right away so you can DIY your way to more money as soon as you decide to!

[*I am an affiliate of the reseller guide and earn a commission when you sign up through my link]


2nd: Open a Poshmark Closet  

I opened my first Poshmark Closet, Fairface Vintage , and a little later when I got more comfortable, an Ebay Store, Fairface Vintage . 

By following the reseller guide, I was able to set up my shop and start making money, my way, right away. 

Because I know it works, I also know if I put more time into it, my extra income can grow substantially. I can't think of a better way to make extra money doing it myself! 


With this DIY Approach How Much Money Can You Make?

The great thing about DIY'ing your way to extra money is that you really can do it yourself, your way. How much money you make really depends on a few factors:

  1. How much time you have to put into it.
  2. How much demand there is for the items you want to re-sell.
  3. How much money you spend on the items you are going to resell (if you thrift).
  4. How much your items are currently selling for. 

Although it can vary month to month, I notice the more time I spend, the more quality items I list, the more I increase my sales and extra income. 


DIY method to earning extra money by selling on Poshmark

You really Can to Make Money the DIY Way! 

I hope this post doesn't sound too salesy (I know it's pushing it). I'm just really excited to share this with you because most of my readers are DIY people, who would rather Do It Themselves, versus handing it over to someone else!

You really can make extra money by doing it yourself and it's way easier than most people think. 

By:

  • Getting this Reseller Guide to help you easily know how to start 
  • Finding inventory to resell from home first (and tell your family and friends! They may share items to re-sell with you!) 
  • Starting with one reselling platform 
  • Setting aside a little time

You'll be bringing in extra money in no time. It may seem intimidating at first, but once you get that first sale you'll be unstoppable! 

Do you already make extra money by Doing It Yourself? Share your DIY money making strategy and/or Poshmark Closet in the comments so we can find you! 

Cheering you on always!

xo Shannon


Tuesday, September 16, 2025

The Trick to Keeping Produce Fresh Longer

keep produce fresh longer with OXO Good Grips GreenSavers
I used to have such a love / hate relationship with my fruits and vegetables. They started out so fresh and lovely the day I bought them, but eventually they would shrivel up (or mold out) and end up in the trash, along with my guilty conscience. 

I wish I had known about this trick to extend the life of my fruits and veggies a long time ago, so I had more time to eat them, and stop with all the produce guilt!

My husband and I stumbled upon these little carbon filters one day and thought, what the heck, we can't lose by trying. And since tossing these in our crisper drawers, I kid you not, I haven't thrown out a single mushy fruit or vegetable! I'm just as shocked as you are!

*(this post contains an Amazon link & as an Amazon Associate I earn a small percentage of each sale.)

Keep Produce Fresh Longer with THIS Little Packet 

It turns out, the key to keeping produce fresher longer in your cripser drawers are 
>>These OXO Good Grips GreenSaver Carbon Filters !

  • No more throwing away soggy spinach, mushy cucumbers or moldy fruit. 
  • All you do is toss one of these little packets in your crisper drawer and it gobbles up the ethylene gas that spoils fruits and veggies. 
  • They extend the fresh life of your fruits and vegetables so you have more time to eat them.
  • No more guilt from spoiled produce! 

If I had known about these, I would have tried them years ago.


fresh fruits and veggies stay fresh longer with this packet in crisper drawer

A few reviewers have found the same positive results that I did:


"Put one of these into your container of fruit or veggies and it helps keep them fresher longer! I was so tired of throwing stuff away and this has helped immensely!"

"I use these in my refrigerator & they do work!" 

"These things help to keep your fruits & veggies from wilting & rotting…they sustain the life of your fruits & veggies 1-2 weeks longer" 


*And just a side note, OXO sells a "produce saver container" that you can put the little filters in, 

but we just bought the refills and toss one in each drawer and it works just fine. As long as you give them a little space to work, they last around 3 months.

Have you tried carbon filters to keep your fruits and veggies fresh longer? If not, I highly recommend these! You will be very pleasantly surprised at how much longer your fruits and veggies last!


Wednesday, July 12, 2023

Do DIY Whiteboard Cleaners Work?

white board cleaners DIY
I'll admit, I'm not the best at cleaning my whiteboard regularly. In fact, my latest "brain dump" has been sitting on my whiteboard for 2 years. Cringe.

According to Polyvision, the best way to maintain the cleanliness of your white board is to clean it regularly with white board cleaner. Oops.

Since I didn't have any white board cleaner on hand, I tried out several DIY Whiteboard Cleaners to see if I could get my 2 year old marker off without leaving anything behind. Here's what happened:

(*Disclaimer: This post contains Amazon links. As an Amazon associate I earn a small commission for items purchased through my links)

DIY Whiteboard Cleaners Test

*I used a soft microfiber cloth with each mixture

1. Water + 1 tsp White Vinegar

 = Fail 

2. Water + Rubbing Alcohol

 = Fail

3. Hydrogen Peroxide only

= Fail  

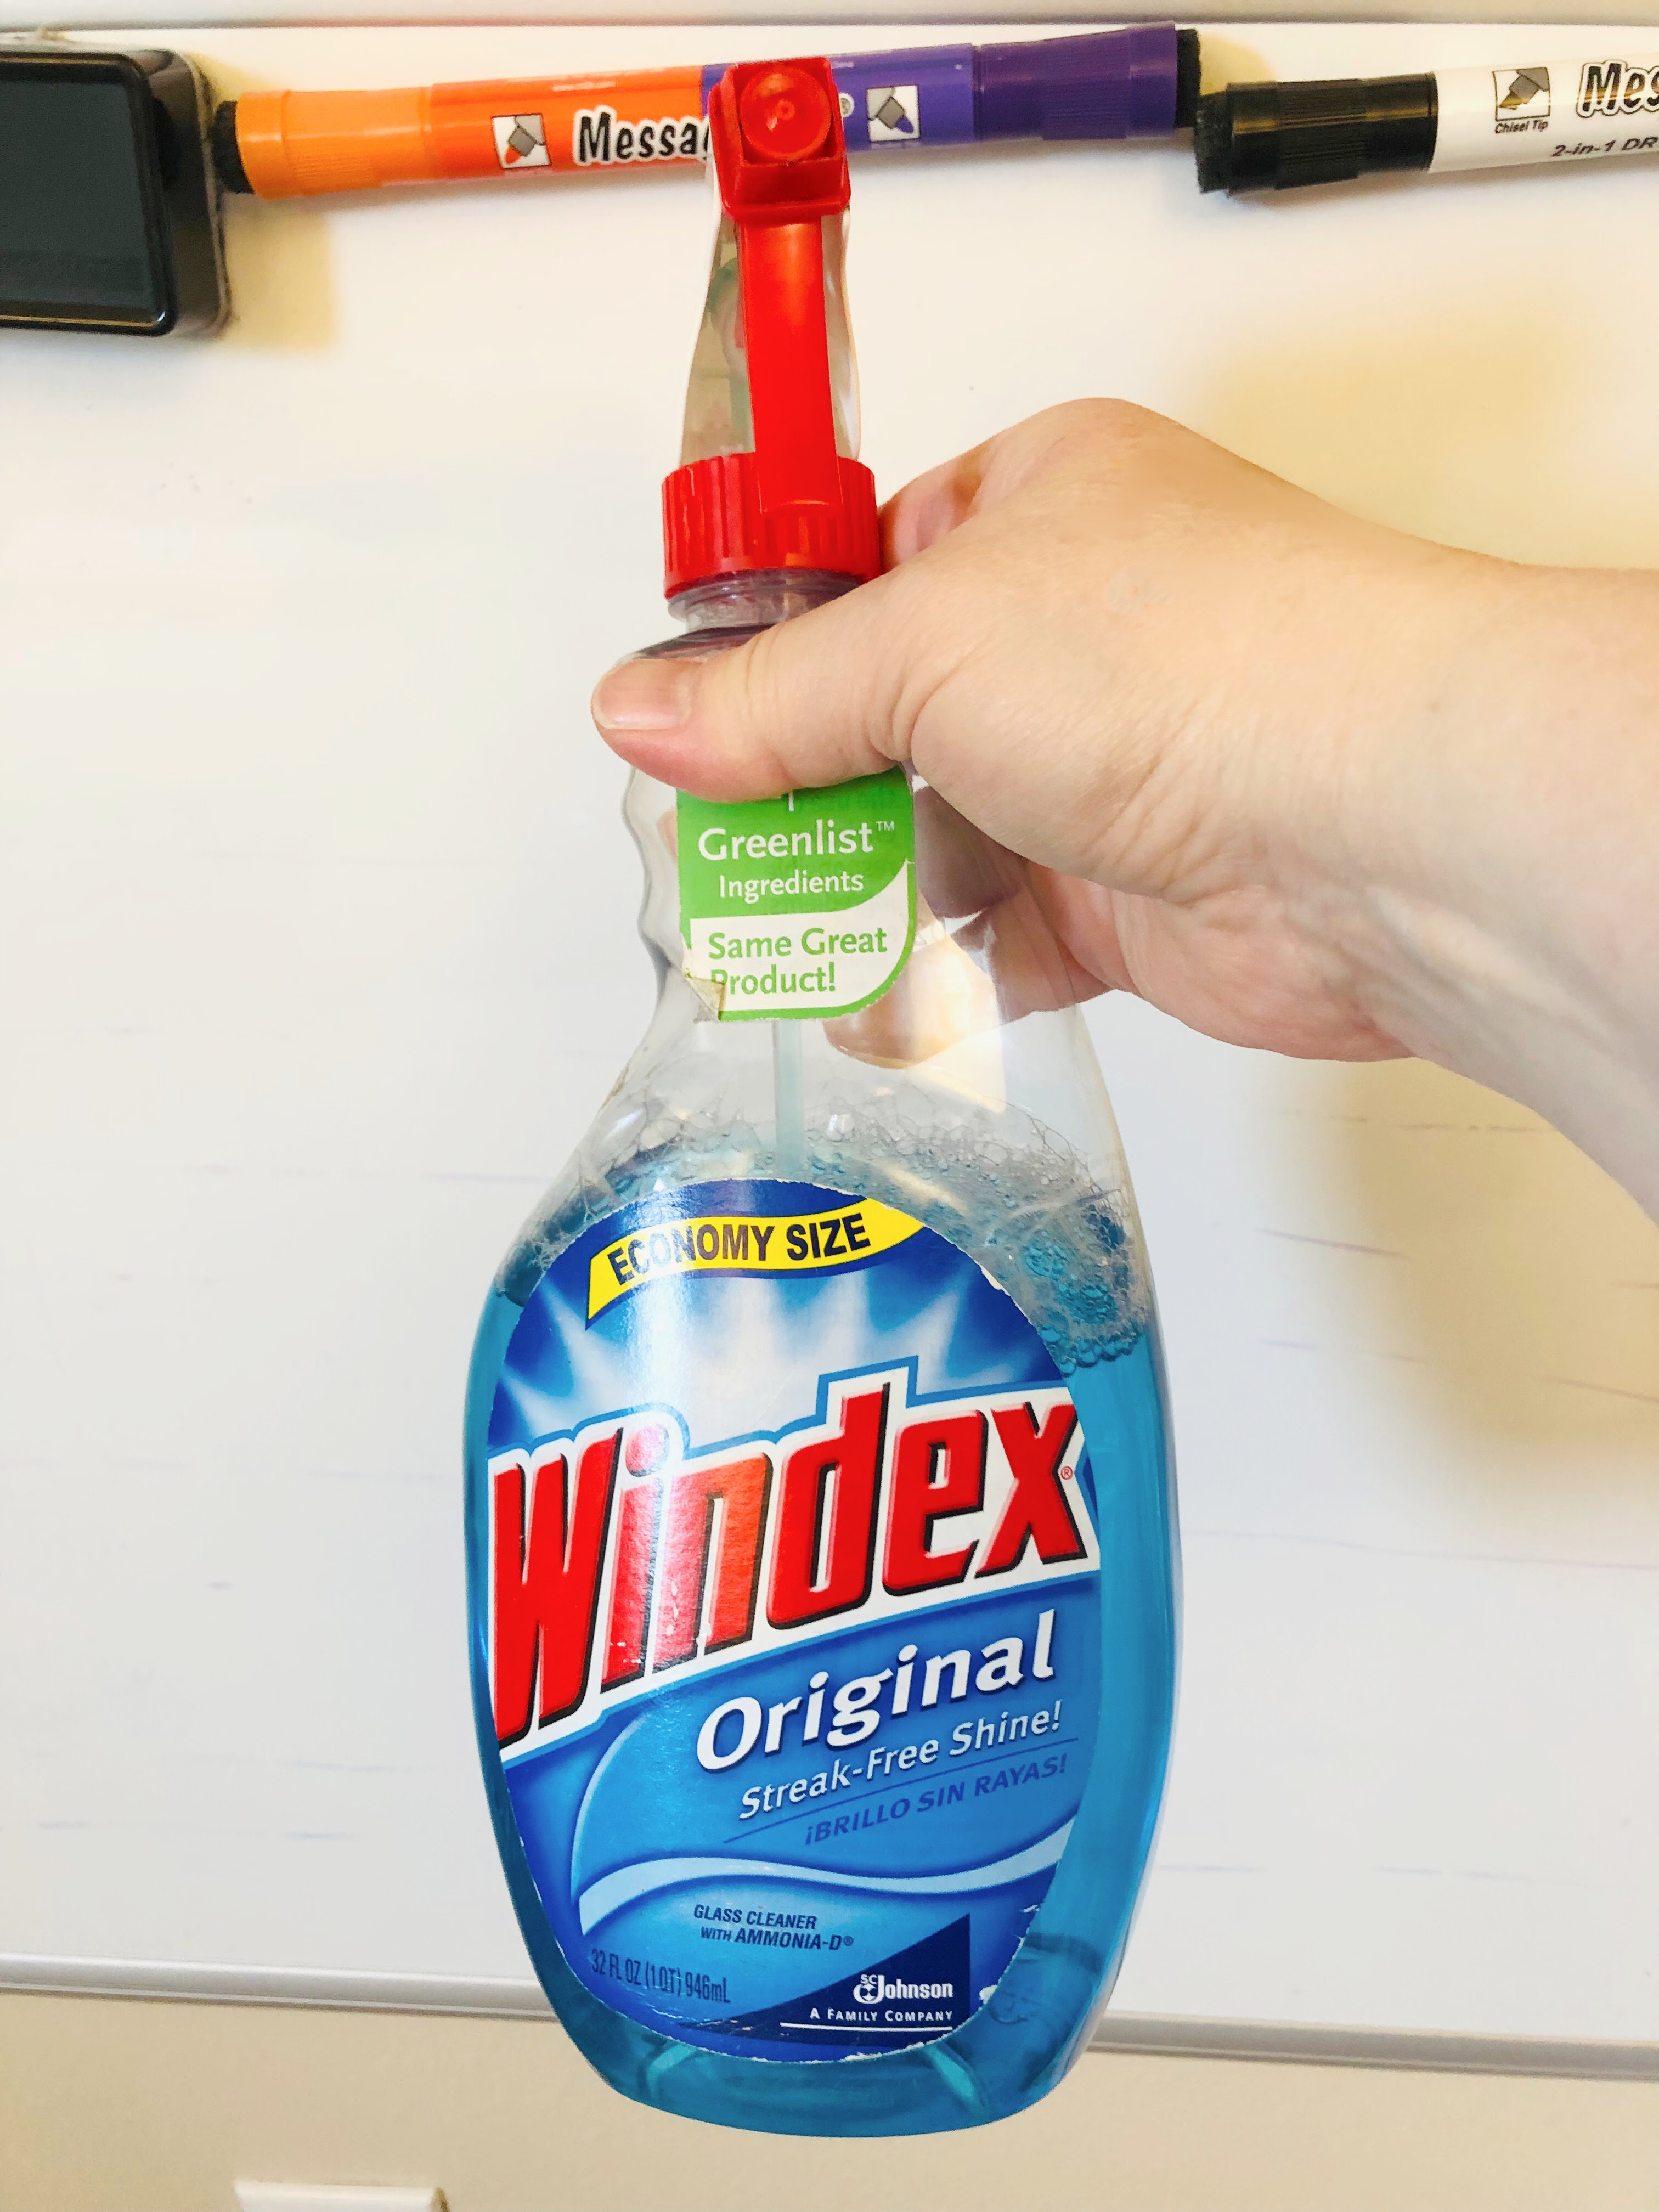
4. Windex only 

= Success!

While this technically isn't a DIY recipe, it is a household cleaner that most people have, versus whiteboard cleaner that not everyone has on hand. 

I used Windex all over my whiteboard and it took off all the most recent (2 year old) text. 

However, it didn't take off the ghost lines that have been there for years (those marker lines you can still see faintly after cleaning your whiteboard). 


5. 70% Isopropyl Alcohol only 

= Success! 

*Rubbing Alcohol is the ONLY thing that removed the "ghost lines" that have been there for years! I didn't use this all over my whiteboard because I was afraid it might damage the glossy finish, but it didn't. I still would recommend only using rubbing alcohol on the most stubborn stains.


cleaning white boards with DIY cleaners before and after


DIY Whiteboard Cleaner Winners

Disclaimer: I have included convenient links to each product. As an Amazon Associate I earn a small commission for each sale purchased through my links. Thanks for your support!


use windex to clean whiteboards
The Best DIY Whiteboard Cleaner

Windex (which isn't so much DIY, as it is more of just a household item for other things)

*Amazon Buy it here: Windex


erase whiteboard ghost lines with rubbing alcohol
The Best DIY Whiteboard Cleaner for Ghost lines

70% Isopropyl Alcohol (aka Rubbing Alcohol)


*Amazon Buy it here: 70% Isopropyl Alcohol


use microfiber cloths to clean whiteboards

The Best Whiteboard Microfiber Cloths

*Amazon Buy it here: Microfiber Cloths Set


best cleaner for white boards Expo

*Amazon Buy it here: The Best Actual Whiteboard Cleaner (that you should be using  every week)


Watch me get this 2 year old stubborn writing off my whiteboard!


Shannon Sorensen is the creative force and blogger behind Shannon Sews

You can watch her Youtube videos, follow her on Instagram and 

She is also the founder and CEO of Fairface Washcloths, a popular sensitive skin care line of washcloths, and hosts the Fairface Podcast and Cut, Sew, Grow Podcast on Apple podcasts.

She is currently working on a program to help others find success with their own sewn products with her upcoming course line Cut, Sew, Grow.

You can follow her on Instagram @FairfaceWashcloths, @CutSewGrow and @ShannonSorensenDesigns 


Thursday, June 6, 2013

DIY Grippy Hangers: Stop shirts from sliding off hangers

stop shirts from sliding off hangers by adding hot glue to hangers
It drives me nuts when shirts slide off their hangers.

You slap that baby back on the hanger, give it a good stare down to show it who's boss, and then ever so carefully return it to the closet. 

But when your shirt's too wide for the span of the hanger? It will inevitably slide off again...and again...looking quite sad, slumped and crumpled. I don't know why it irritates me so much. Grrrr.


Since I don't have any fancy hangers with that fuzzy stuff on them that makes shirts stick like a charm, I decided I must have something crafty I could use to make my own. And in fact, I did. It pays to be a girl with a glue gun.

How to Make your own Grippy Hangers
{Stop shirts from sliding!}

Supplies:

*Hot Glue Gun with glue stick
*Hanger (works on plastic, wood and wire)
use hot glue to help clothes grip to their hangers

Instructions:

*Heat your hot glue gun
*Squirt a line of glue across the top arm of the hanger on both sides. If your hanger has divets, don't go in them.


apply hot glue to a hanger's arm to add grip

*Once your hot glue has been applied, it should look something like this (below).
*Wait for the hot glue to dry (usually only takes a few minutes)

stop clothes from sliding off hangers by applying hot glue to the hanger arm

*Once dry, the hot glue becomes more cloudy in appearance (below). Touch it to make sure it has completely dried. That rubbery substance is what will keep your shirts in place!

*Gently peel off any stray glue strands.

Dried hot glue on a hanger becomes rubbery to prevent shirts from sliding

And voila! You now have a Grippy Hanger that will keep those sliding t-shirts in place!

use hot glue on hangers to prevent shirts from sliding

Not bad for a 5 minute project.

how to keep shirts on their hangers: DIY Grippy Hangers


Job Update:
For those of you following the saga of my job change, I'm still in limbo. What was once an "unalterable change", is now possibly changing again. What? I can only hope that means I'll get to stay at my school, but I'm not holding my breath. After a lot of prayers and talking things through, I feel more at peace about everything. Although my number one wish is to stay with my current kids, staff and school, I know I can make a difference wherever I go, and if I'm needed elsewhere, I will be sad, but I will accept that. I'll keep you posted. xo

EDIT (same day after work): You won't believe it. I'm still having a hard time believing it myself, but the big boss changed his mind and is allowing me to stay at my current school! I am so grateful and happy. This is truly a miracle and answer to many prayers. I'm walking on sunshine! Woohoo!


Never miss a post! Subscribe to ShannonSews
Like on facebook.com/SSorensenDesigns
Follow @ShannonSews1 on Twitter
Subscribe to youtube.com/ShannonSews

Linked to: http://www.bubblynaturecreations.com, http://shabbynest.blogspot.com, http://www.504main.com

Sunday, December 30, 2012

DIY Vacuum Extension Tube Replacement

Missing vacuum extension tubes: a cheap alternative to replacement tubes
ATTENTION: Don't throw away your empty wrapping paper tubes!

Left-over empty cardboard wrapping paper tubes aren't just for kids to shout through or hit each other over the head with (still tempting as an adult). There is a practical and exciting use for them! Yes, I do get excited about the strangest things.

We inherited this vacuum a while back. I love vacuums with hose attachments to reach those hard-to-reach places where dust bunnies like to hide.

The vacuum itself works great, but the extension to the hose is missing. Drat! Still too short to do the best of the dirty work.

{Enter: Empty Wrapping Paper Tubes}
The perfect DIY solution for replacing missing vacuum extension tubes! 

After combining the odds and ends of left-over wrapping paper onto one roll, we ended up with a few empty wrapping paper tubes that fit snuggly into the hole for the hose attachment. Wahoo!

Fit empty wrapping paper tubes snugly into place to act as vacuum attachment


And look! My empty cardboard wrapping paper tube works perfectly. I'll take that over spending a bunch of money on a replacement vacuum extension tube. And it works just as well! Look out dust bunnies!


easy, cheap vacuum extension tube replacement do it yourself solution
A few quick tips:

  • Make sure the tube fits snugly in place.
  • Label the top and bottom of the tube and attach the top to the vacuum each time (after using it several times the bottom end starts getting a little beat up). 
  • Do not alter the end of the tube (I tried squeezing one end together to mimic a skinny spout and the suction of the vacuum ended up sucking the tube together. Oops.)


Happy New Year image
Only 1 more day til 2013. Crazy!
Have a Happy New Year!


Never miss a post! Subscribe to ShannonSews
Like on facebook.com/SSorensenDesigns
Follow @ShannonSews1 on Twitter
Subscribe to youtube.com/ShannonSews

Wednesday, September 12, 2012

How to store large tissue paper

Storing large tissue paper
Tissue paper is one of my staples. I use it to stuff pretty gift bags, wrap my etsy sales up in it, make giant pom poms with it, print photos on it, you name it.

Tissue paper can be surprisingly pricey though and in those little packages they only give you like 5 pieces for $4.00. Come on. 

That's why I look forward to the holiday season when Costco sells the jumbo monster-sized package of tissue paper. Since it's only around during the holidays, I make sure I stock up.


If you're like me and don't have a lot of extra storage space because you've already taken over the house with all your sewing and crafting supplies, it's hard to know where to heave that hippo-sized package of tissue. In a moment of crafting clarity, I found a solution.

Have a large sized cereal box? That's all you need. Minus the cereal. Of course.


Use cereal box or cardboard to large tissue paper storage

FIRST Open up all sealed edges of your largest cereal box. I used a jumbo box of Cheerios from Costco. Everything is jumbo there. 

SECOND Lay out your tissue paper and cut your cereal box in half, length-wise, with the length as long as the tissue and the width not wider than the original tissue bag. You will use both pieces of your cereal box.

Use cardboard sleeve for support when storing tissue paper

THIRD Sandwich the mass of folded tissue paper in-between the pieces of cardboard and slide carefully back in the original bag. It slides in pretty easily with the underside piece of cardboard in a bit farther than your tissue. 

Slide tissue into original bag with cereal box cardboard sleeves


FOURTH Stand it up and store it! See how nice and straight it stands so you won't crinkle it all up by shoving it in the closet or under the bed? I know you wouldn't have done that.


Stand large tissue paper to store with cardboard support

It's even skinny enough and now protected enough, to squeeze it in whatever nook and cranny you have left. What do you know? My very last cranny.

Store large tissue paper even in tight spaces


Never miss a post! Subscribe to ShannonSews
Like on facebook.com/SSorensenDesigns
Follow @ShannonSews1 on Twitter
Subscribe to youtube.com/ShannonSews

Friday, September 7, 2012

Fix holes in gauze or lightweight fabric

How to fix holes in gauze or other lightweight fabricA friend of mine asked me if I could fix a couple of her skirts. The first one had a ripped lining. Simple to take in a 1/2 inch and sew it right up. The other? I had my work cut out for me.

The gauze-like material had ripped away from the trim, creating holes all over the skirt. Yowza!


I'll admit, it hurt my brain a little, but I discovered a method to fixing holes in lightweight fabric like this woven gauze-type material, that actually seemed to work.

*Disclosure: As an Amazon Associate I earn from qualifying purchases. This post may contain affiliate links.


Materials You'll Need: (*Amazon product links added for your convenience. Each link will take you to Amazon)
Lightweight Cut-away permanent stabilizer
Lightweight Stitch Witchery hem tape
Scissors
Iron
Damp lint-free cloth
Parchment paper

Fix rips in lightweight material using hem tape and stabilizer

In case you aren't familiar with stitch witchery, it is a fabric adhesive. The web-like material adheres fabrics together by using the heat of an iron and the steam created from the protective damp cloth. It is also called hem tape because it is a quick way to hem pants. Turn them under and heat seal the seam. Sticky magic.

Permanent Stabilizer is lightweight, textured, non-woven nylon. It provides stability to stitching on lightweight knits and woven fabrics so they won't stretch out or sag. You may have seen stabilizer on the inside of a shirt that has embroidery on it. It's soft and flexible.

Alrighty then...To cover each hole, I cut a piece of stitch witchery to cover the length of the trim, including the ripped section, and a piece of stabilizer bigger than the hem tape.

Fix rips in lightweight fabric with stitch witchery and cut-away stabilizer


I put a big piece of parchment paper under the hole so the stitch witchery wouldn't adhere to the ironing board, and re-used it as I fixed each hole.

It was a little tricky, but with my fingers I carefully maneuvered the remaining gauze strands to cover the hole, trying my best to match the existing weave pattern.

Next, I carefully placed the hem tape across the hole and along the trim line, and the piece of stabilizer went on top of that. I used stabilizer in hopes to secure the gauze to something that would help it maintain its place against the trim.

With a damp cloth placed carefully on top of the hem tape and stabilizer, I pressed down the hot iron on the damp cloth for like 11-12 seconds.

fix tears in sheer fabric by layering hem tape and stabilizer

It took some time, but the results were surprisingly good. Hem tape is so sheer and stabilizer is so light-weight that you can't even see it through the fabric. With the gauze fabric against the inner cotton lining, the "fixes" seemed to disappear. 

fabric coming away from the trim can be fixed with stitch witchery

Needless to say, my friend was thrilled with the results. I'm hoping her skirt continues to hold up for her and they have many more happy years together! xo

*This post contains links to products through Amazon.com and as an Amazon Associate I earn from qualifying purchases.


Never miss a post! Subscribe to ShannonSews
Like on facebook.com/SSorensenDesigns
Follow @ShannonSews1 on Twitter
Subscribe to youtube.com/ShannonSews

Monday, August 27, 2012

Hemming Pants DIY: Quick and Lazy Method

Hem pants tutorial quick and easy method
Every year before school started it was pants hemming time and my mom was down on the floor with her straight pins. I can still remember the feel of the little tugs at my ankles as she folded under the excess fabric and secured it carefully into place.

Then out with her needle and thread, she would sit and carefully hand stitch the new hem in place. Bless her heart. If my mother had a nickle for every pair of pants she hemmed for all of us 6 kids she'd be a very rich woman.

Flash forward to present day...and my dislike for hemming pants. I don't know why it annoys me, but it does. Why can't my pants just be the right leeeeennnnngth?! Ok. Tantrum over.

-------------------------------------------------------------------------

In-between bouts of whining, I discovered a way to hem my pants in no time at all. No cutting, no ironing, no turning under twice. Just measure, pin, fold under and sew.

*Note, this method for quick pants hemming works on pants that are only about an inch or two too long for you. I'll share a couple other methods at the bottom if you don't fit this category.

::How to hem pants the quick and lazy easy way::


Hemming pants accurately by measuring length with shoes on
STEP ONE: Put your pants on WITH shoes you will be wearing. If you don't measure your pants with shoes on, you may end up with high-waters...and we don't want that.


STEP TWO: Turn under your pant leg to your desired length (~1/2 inch higher than the base of your shoe) and pin the bottom edge. You can do this in front of a floor length mirror or use a helper.


Pin new hem in place by turning pants under evenlySTEP THREE: Remove your pants and turn them inside out. Turn all of your hem under to match the marked pin. This will become your new hem. The trick to this easy hemming method is that you do no cutting. You are simply folding under the excess fabric and sewing it to the underside of your pants.


Hem pants by folding under seam and straight stitchingSTEP FOUR: With pants still inside out and new hem pinned, sew a straight stitch all around the pant leg, stitching over where you start and stop to secure seam.


straight stitch hem under for clean finishSTEP FIVE: Marvel over your clean, finished work (view from inside). *I lightened these images so you could more easily see the seams. The pants are really jet black.


how to hem pants easily with a clean finished lookView from the outside (your new hemline).


easiest way to hem pantsEven if your hemline is a little higher up on the pant leg (because your pants were longer and you had more to turn under), this method would work. Here are the pants without lightening the image. Jet black seam = hardly even noticeable.


I think I still have a pair of gray pants I never wore last year because I put off hemming them. Now I don't have an excuse!


Never miss a post! Subscribe to ShannonSews
Like on facebook.com/SSorensenDesigns
Follow @ShannonSews1 on Twitter
Subscribe to youtube.com/ShannonSews
Blogging tips